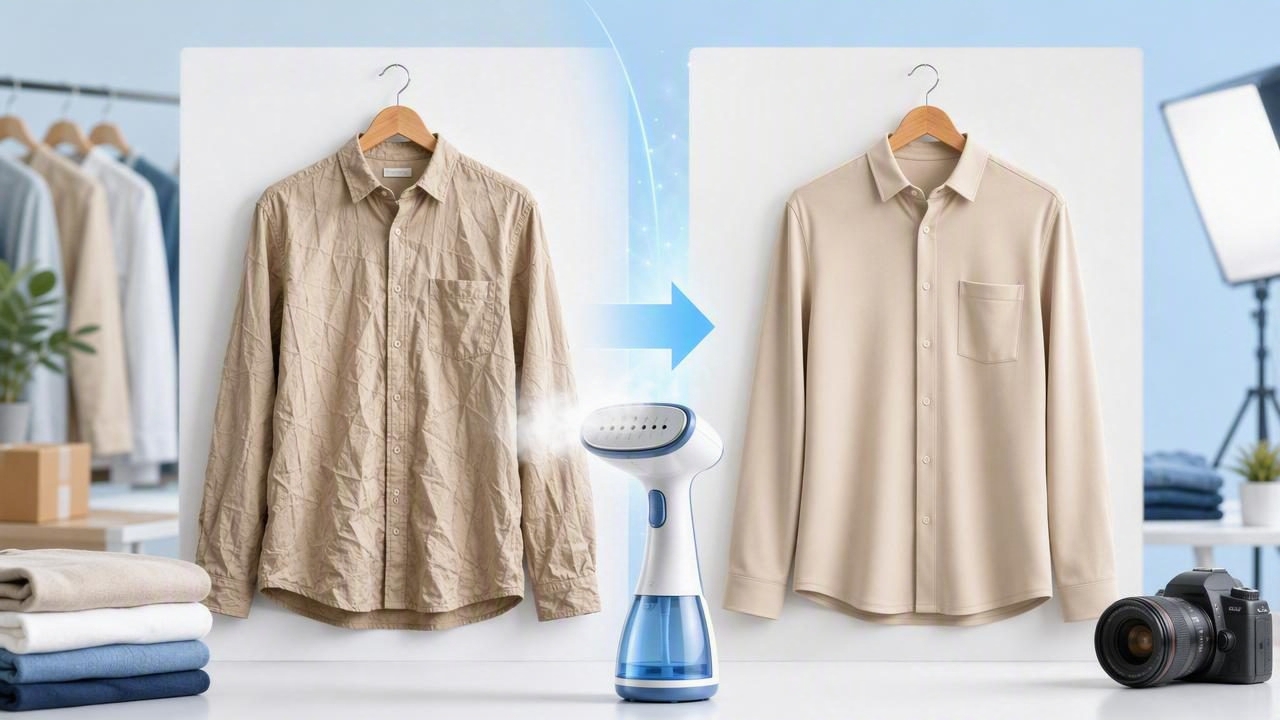
In fashion reselling and e-commerce, the condition of a garment is only part of the story. The way it looks in photos determines whether a shopper clicks, trusts the listing, and decides to buy. Even a high-quality dress, jacket, or sweater can appear worn, poorly stored, or less valuable when it is covered in distracting creases.
A wrinkle remover for clothing photos helps sellers create a cleaner presentation without needing to steam every item, set up a studio, or spend extensive time editing. Used thoughtfully, it can make product images look more polished while still representing the garment honestly.
This guide explains why wrinkles matter in online clothing listings, how photo-based wrinkle removal works, when to use it, and how to build an efficient editing workflow for consistent e-commerce photography.
Why Wrinkles Matter in Clothing Listing Photos
Online shoppers cannot touch fabric, try on an item, or inspect its drape in person. They depend on your images to answer important questions: Is this item clean? Has it been cared for? Is the fabric in good shape? Does it look like the listing description?
Wrinkles are normal, especially when clothing has been folded, shipped, thrifted, or stored in bins. However, heavy wrinkles can create an unintended impression that an item is old, neglected, or damaged. They may also hide useful details, including stitching, pleats, texture, seams, logos, and fabric quality.
For sellers, a clean visual presentation offers several benefits:
- Stronger first impressions: Smooth-looking garments appear more ready to wear.
- Better perceived value: Buyers often associate neat photos with higher-quality inventory.
- Clearer product details: Fabric, cut, and design features are easier to see.
- More consistent storefronts: A similar editing standard makes a shop look more professional.
- Less listing friction: Clear photos can reduce uncertainty before purchase.
That does not mean every garment should look unnaturally flat. Linen, cotton, gauze, and relaxed fabrics naturally have texture. The goal is not to erase the character of the material; it is to remove distracting storage creases and create a more intentional clothing presentation.
What Is a Photo Wrinkle Remover?
A photo wrinkle remover is an editing tool that reduces visible creases in clothing images. Rather than physically ironing or steaming the garment before shooting, the tool uses image editing technology to soften or remove wrinkles after you have taken the photo.
Modern AI photo editing tools can identify areas that look like unwanted fabric creases and smooth them while preserving the garment’s shape, color, print, and edges. This can be especially helpful for fashion resellers who photograph many items in one session.
It is important to distinguish between wrinkles and garment details. A good result should preserve:
- Natural folds that show how the garment hangs
- Pleats, ruching, gathers, and intentional draping
- Knits, ribbing, quilting, embroidery, and textured fabrics
- Seams, pockets, buttons, zippers, and labels
- Prints, logos, and color variation
Think of wrinkle removal as digital tidying. It should improve the presentation, not change the item into something different from what the buyer will receive.
Physical Steaming vs. Digital Wrinkle Removal
Steaming remains useful, particularly for highly wrinkled garments or items with difficult shapes. But it can slow down a high-volume listing process. A digital wrinkle remover gives sellers another option, especially when they need to prepare photos quickly.
| Method | Best For | Advantages | Limitations |
|---|---|---|---|
| Steaming or ironing | Deep creases and heavily folded garments | Improves the actual item before photography | Requires time, equipment, and handling |
| Photo wrinkle remover | Light to moderate creases in listing images | Fast, convenient, and useful for batch editing | Should be reviewed to avoid over-editing |
| Combined workflow | Premium items or detailed garments | Creates the cleanest, most accurate presentation | Takes slightly more preparation |
For many sellers, the most practical approach is simple: steam when a garment needs major physical improvement, then use photo editing to refine minor creases that remain visible under lighting.
How to Use a Wrinkle Remover Without Misrepresenting Clothing
Honest e-commerce photography is essential. Editing should help buyers see the item more clearly, not conceal flaws or alter fit. When using a wrinkle remover, follow a light-touch approach.
1. Start with the best possible original photo
Editing works best when the starting image is clear. Use bright, even lighting, a simple background, and enough space around the garment. Photograph the item flat, on a hanger, on a mannequin, or on a model depending on the style of your listing.
Before taking photos, quickly smooth the garment with your hands. Straighten collars, align sleeves, button buttons, and make sure hems are not curled under. Small adjustments at this stage can dramatically improve the final image.
2. Remove only distracting creases
Focus on sharp fold lines, compression marks from storage, and random wrinkles that pull attention away from the garment. Leave natural drape intact. For example, a blazer may need smoothing across the front panel, while the soft fold at the elbow of a sleeve should remain.
3. Zoom in to inspect details
After editing, review the image at a larger size. Check printed graphics, knit patterns, lace, buttons, and edges for distortion. If the fabric starts to look blurry, waxy, or unnaturally smooth, reduce the effect or undo it.
4. Keep condition photos truthful
Never use a wrinkle remover to hide stains, holes, pilling, pulls, discoloration, or permanent creasing caused by wear. Those are condition details, not temporary presentation issues. Photograph flaws clearly and mention them in the item description.
Helpful rule: If a buyer would see it when the item arrives, do not edit it away.
A Fast Clothing Photo Workflow for Resellers
The best workflow is one you can repeat. Whether you list five pieces a week or hundreds each month, a consistent sequence reduces decision fatigue and helps your shop maintain a recognizable visual standard.
- Inspect and prepare the garment. Check for flaws, remove lint, and lightly smooth the item.
- Choose a presentation style. Use flat lay, hanger, mannequin, ghost mannequin, or model images based on the garment and platform.
- Take multiple angles. Include front, back, brand label, size tag, fabric details, and any flaws.
- Select the clearest hero image. Your first photo should show the full garment and its overall shape.
- Apply background removal if needed. A clean, simple backdrop keeps attention on the item.
- Use wrinkle removal sparingly. Smooth distracting creases while keeping fabric texture realistic.
- Adjust brightness and crop consistently. Make sure colors are close to the real item.
- Review before publishing. Compare the edited image with the original to confirm accuracy.
This process is especially effective when editing in batches. Photograph similar items together, then apply the same background, crop style, and wrinkle-removal standard across the group.
Best Clothing Types for Wrinkle Removal
A wrinkle remover can be useful across many categories, but the amount of editing should vary according to fabric and garment construction.
- Shirts and blouses: Smooth storage folds around the torso, collar, and sleeves.
- Dresses: Reduce random creases while preserving the skirt’s natural flow.
- Blazers and jackets: Clean up front panels and lapels to emphasize structure.
- T-shirts: Remove heavy fold lines that distract from graphics or branding.
- Jeans and trousers: Soften packing creases without removing the natural denim texture.
- Activewear: Make smooth technical fabrics look neat while retaining seams and contouring.
Use extra caution with linen, velvet, chunky knits, sequins, leather, suede, and heavily textured fabrics. Their natural surface variation is part of the product, and over-smoothing can make the image look inaccurate.
Common Mistakes to Avoid
Even a useful editing feature can hurt a listing if it is used too aggressively. Watch for these common mistakes:
- Making fabric look plastic: Excessive smoothing removes believable texture.
- Erasing intentional design details: Pleats and ruched sections should not be flattened.
- Editing only the hero photo: Keep the garment’s appearance consistent across all angles.
- Changing the garment silhouette: Do not reshape sleeves, waistlines, or hems.
- Ignoring lighting problems: Wrinkle removal cannot fully fix harsh shadows or poor exposure.
- Hiding condition issues: Transparency protects your seller reputation and buyer trust.
Frequently Asked Questions About Clothing Wrinkle Removers
Can a wrinkle remover replace steaming clothes?
For light and moderate wrinkles in photos, it can save considerable time. For deeply creased garments, however, physical steaming may still produce a more natural result. The strongest approach is often a combination of basic preparation and careful photo editing.
Will wrinkle removal work on patterned clothing?
It can, but patterned items require close review. Stripes, checks, florals, logos, and textured prints can become distorted if the effect is too strong. Always zoom in before saving the final image.
Should I disclose that I edited my product photos?
Standard presentation edits such as cropping, brightness adjustments, background cleanup, and minor wrinkle removal are common in e-commerce photography. The key is that the images remain an honest representation of the item’s color, condition, shape, and features.
Make Clothing Look Ready to Buy
Clean product photos help shoppers focus on what matters: the garment’s style, fit, fabric, and value. A wrinkle remover is not about making clothing look unrealistically perfect. It is about removing visual distractions that can prevent a good item from getting the attention it deserves.
When paired with clear lighting, consistent backgrounds, accurate condition photos, and thoughtful clothing presentation, wrinkle removal can make your listing workflow faster and your store look more cohesive. Tools such as Clothing Studio can help resellers refine clothing images on a mobile workflow while keeping the final result polished and believable.