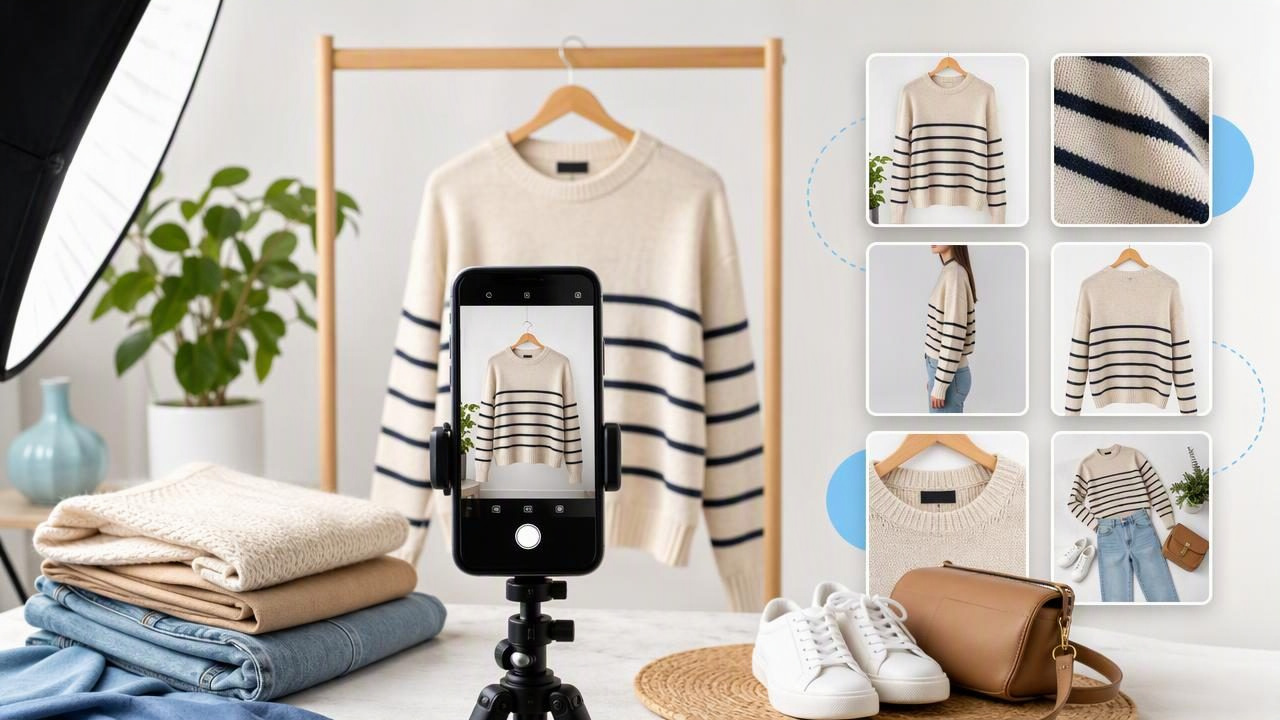
Strong Poshmark photos help shoppers understand what they are considering before they open a listing, read the description, or make an offer. In fashion resale, photographs do more than make an item look appealing: they show silhouette, color, fabric, condition, details, and scale. A clean, consistent photo set can make a closet look more dependable while helping buyers compare pieces quickly.
The goal is not to make a used garment appear brand new or to edit away meaningful signs of wear. The goal is to present the item clearly and honestly. With a repeatable setup and a few intentional angles, you can create clothing photos that look organized, informative, and ready for e-commerce.
What Makes Poshmark Photos Useful to Shoppers?
A buyer cannot touch the material, inspect the seams, or try on the item. Your images need to answer the questions they would ask in person. The most helpful listings balance a polished first image with detailed supporting photos.
- Visibility: The garment is bright enough to see without blown-out highlights or deep shadows.
- Accuracy: The color, texture, shape, and visible condition are represented fairly.
- Coverage: The photo set includes the front, back, labels, details, measurements, and flaws when applicable.
- Consistency: Similar backgrounds, crops, and lighting make your closet easier to browse.
- Context: Shoppers can understand how the item is constructed and, where helpful, its approximate scale.
A highly styled image may earn attention, but it should not replace practical proof. For example, a close crop of a sweater on a model can be useful as a secondary image, yet buyers still need a clear full-garment view, the fiber-content label, and close-ups of any pilling.
Start With a Simple, Repeatable Photo Setup
You do not need a large studio to improve Poshmark photos. A consistent area near indirect daylight can be enough. Choose a spot with a plain wall, foam board, poster board, or clean neutral backdrop. Avoid busy rugs, wrinkled sheets, cluttered shelves, and harsh sunlight crossing the garment.
Before taking photos, prepare the item carefully. Fasten buttons, zip zippers, straighten straps, remove lint, and arrange sleeves so the silhouette is easy to read. If the garment has light wrinkles from storage, smooth it gently or use appropriate garment care before photographing. Minor wrinkle retouching can improve presentation, but it should not change the construction, conceal damage, or imply a different fit.
A practical lighting checklist
- Photograph near a bright window with indirect light when possible.
- Turn off nearby lights if they make white fabric look yellow or gray.
- Use the same setup for the front and back to keep color consistent.
- Hold the camera level and avoid an extreme wide-angle perspective.
- Take a test image, then compare the screen image with the actual garment.
That final comparison matters. Navy can look nearly black in low light, cream can look white under cool lighting, and a subtle print can disappear when an image is overexposed. If the color is difficult to capture, say so in the listing description and include a close-up taken in the clearest available light.
The Essential Poshmark Photo Sequence
Think of your listing images as a visual inspection. The first image should be the strongest, clearest overview. Every image after that should answer another buyer question. While the exact sequence depends on the item, this framework works for most apparel listings.
| Photo | What It Shows | Why It Matters |
|---|---|---|
| 1. Front overview | The full garment, centered and neatly arranged | Creates an immediate, easy-to-scan first impression |
| 2. Back overview | Back shape, closures, seams, and coverage | Completes the silhouette buyers cannot infer from the front |
| 3. Brand and size label | Brand, tagged size, and relevant markings | Supports accurate search and sizing decisions |
| 4. Fabric and care label | Fiber content and care information | Helps buyers assess feel and maintenance needs |
| 5. Detail close-ups | Buttons, embroidery, lining, texture, pockets, or hardware | Shows quality and distinctive features |
| 6. Condition photos | Visible wear, stains, pulls, fading, or repairs | Sets clear expectations and supports buyer trust |
If you include measurements, photograph the measuring tape placed flat and straight across the relevant area. A tape image is helpful evidence, but add the measurement in writing as well so shoppers do not need to estimate from a photo.
Choose the Right Clothing Presentation Style
Different garments benefit from different presentation methods. The best choice is the one that makes the item’s shape easiest to understand without creating a misleading impression.
Flat lay photos
Flat lays work well for T-shirts, knitwear, pants, scarves, children’s clothing, and casual pieces. Lay the garment on a clean, flat surface and arrange it naturally. Ensure hems are not curled under and that sleeves, waistbands, and legs are visible. For oversized items, photograph the full piece first, then add close-ups of the fabric and label.
On-hanger photos
Hangers can be useful for dresses, blazers, blouses, coats, and pieces with drape. Use a simple hanger that does not distract from the garment. Check that shoulders are sitting evenly and that the hanger does not stretch delicate necklines. A hanger can suggest general drape, but it cannot reliably show exact body fit.
Ghost mannequin images
A ghost mannequin presentation can provide a clean view of a garment’s structure, especially for jackets, dresses, and tops. It can help shoppers see the neckline, torso shape, sleeves, and interior details without the distraction of a visible mannequin. However, it should remain faithful to the original garment. Do not use editing to alter length, remove actual damage, manufacture volume, or suggest a fit the item does not have.
Concrete Example: Photographing a Pre-Owned Blazer
Imagine you are listing a black wool-blend blazer with a single-button closure, two front pockets, light shoulder padding, and slight wear inside one cuff. A useful photo sequence could look like this:
- Use a front-facing hanger photo against a plain light background for the main image.
- Take a back view showing the center seam and vent.
- Capture the blazer open to show the lining and interior label.
- Photograph the size, brand, and fabric-content tags clearly.
- Take close-ups of the button, pockets, lapels, and shoulder structure.
- Include a sharply focused close-up of the worn cuff in good light.
- Add photos of pit-to-pit width, sleeve length, and overall length with a tape measure.
For the description, write a concise condition note such as: “Pre-owned condition. Light wear is visible inside the left cuff; see final photo. No other flaws noticed during inspection.” This approach is more useful than relying on a single polished image because it gives buyers the information needed to assess the item.
Editing Poshmark Photos Without Overediting
Basic editing can make your images easier to view. Crop away excess empty space, straighten the image, correct obvious brightness issues, and use background removal when it creates a cleaner product-focused presentation. Keep editing restrained enough that the listing remains an honest representation.
Be especially careful with color adjustment. A small correction may bring a photo closer to reality, but heavy saturation or filters can make a muted olive jacket look bright green or make a faded black tee appear deep black. Similarly, smoothing tools may reduce distracting wrinkles, but they cannot restore worn fibers, repair missing buttons, or remove flaws that should be disclosed.
A useful rule: Edit the photograph to improve clarity, not to change the item a buyer will receive.
Quick quality-control review before posting
- Does the first image show the full item clearly?
- Can a shopper see the front, back, size, and important details?
- Are all visible flaws included in photos and described accurately?
- Does the item color look close to the real garment?
- Is the background clean without hiding garment edges?
- Do the images match the stated condition and measurements?
Common Poshmark Photo Mistakes to Avoid
Many photo problems are easy to prevent. Avoid using only stock images or brand photos as the primary representation of a pre-owned item. They may show a different season, color variation, fit, or fabric finish. Your own photos should show the exact item being sold.
Other common issues include photographing dark garments against dark backgrounds, cropping out hems or sleeves, using blurry label photos, and hiding flaws in shadow. Also avoid placing unrelated props over the garment or using an overly busy setup. The item should remain the visual focus.
Finally, do not assume that one presentation style fits every listing. A flat lay may best show a graphic sweatshirt, while a structured dress may be clearer on a hanger or in a ghost mannequin layout. Choose the format based on what shoppers need to inspect.
Build a Faster, More Consistent Listing Routine
Consistency becomes easier when you batch similar tasks. Prepare several garments, photograph all front views, then capture labels and details. Review images on a larger screen when possible before listing. Save a simple checklist so you do not forget the back view or condition documentation when working quickly.
For resellers who want help refining garment presentation, Clothing Studio’s guide to ghost mannequin photos explains when this format can make clothing structure easier to view. Whatever workflow you use, compare the edited image with the original item and keep all condition details visible and accurate.
Better Poshmark photos do not require perfection. They require clear lighting, thoughtful angles, accurate details, and a presentation that lets shoppers understand exactly what you are selling. When your images answer questions before they are asked, your listings become easier to browse and easier to trust.
