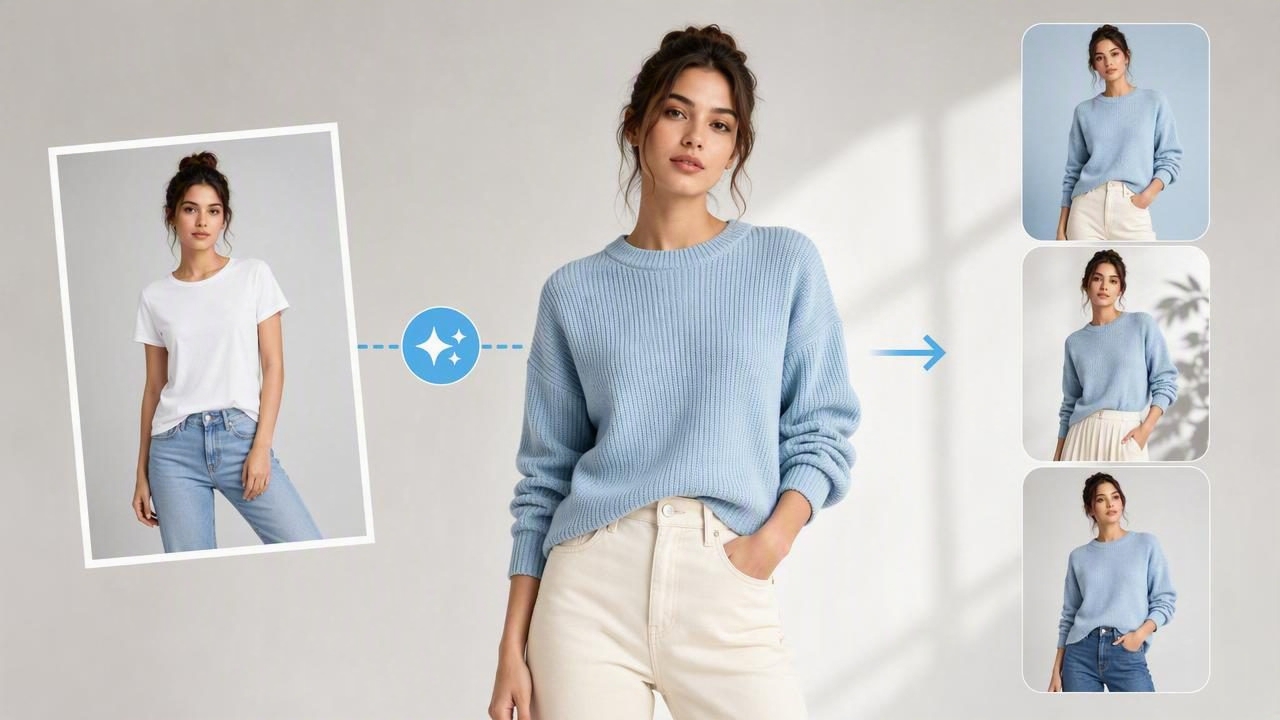
A model photo generator can help fashion resellers and apparel brands create more engaging listing images from a simple garment photo. Instead of arranging a studio shoot for every item, sellers can use AI-assisted imagery to show how a top, dress, jacket, or pair of trousers may look when worn. This can be especially useful for one-off resale pieces, fast-moving inventory, and small businesses that need a consistent visual presentation.
However, a generated model image is not a replacement for accurate product photography. Buyers still need clear evidence of the actual item: its color, labels, measurements, fabric texture, condition, seams, and any flaws. The best approach is to use a model image as a helpful presentation photo, then support it with honest photos of the original garment.
This guide explains when to use a model photo generator, how to prepare clothing images, what to include in a listing, and where AI-generated visuals have practical limits.
What Is a Model Photo Generator?
A model photo generator uses AI photo editing to place or present a clothing item on a generated person. Depending on the image and tool, the result may show an item as a worn outfit, a styled fashion image, or an editorial-style product visual. For sellers, the goal is generally not to create an elaborate campaign image. It is to help shoppers understand the garment’s intended silhouette and styling potential.
For example, a reseller with a clean front-facing photo of a navy linen blazer may use a model photo generator to create a visual showing the blazer worn over a simple top. The listing should still include original photos of the real blazer on a hanger or flatlay, close-ups of the buttons and lining, and a photo of the size tag. If the garment has light wear on a cuff, that wear must remain visible in an original photo and be described in the item condition.
Generated model visuals work best when they supplement rather than replace the core e-commerce photography set.
Why Model Images Can Help Apparel Listings
Clothing is easier to evaluate when shoppers can quickly understand proportion, drape, and styling. A folded sweater on a tabletop can show the color and knit pattern well, but it may not immediately communicate the overall shape. A model-style image can add useful context, particularly for garments that are difficult to photograph on a hanger.
- More visual context: A worn presentation can help shoppers picture the item in an outfit.
- Stronger first image options: A clean model visual may be useful as a secondary or lifestyle-oriented listing image.
- Consistent presentation: Sellers handling mixed inventory can use a more unified look across selected listings.
- Less dependence on photoshoots: Resellers may not need to model every individual item themselves.
- Better styling inspiration: A generated image can suggest how a garment might be layered or paired.
These advantages do not eliminate the need for accurate listing details. In fact, the more polished a generated image looks, the more important it becomes to include straightforward product photos that show exactly what the buyer will receive.
Start With the Right Source Photo
The quality of a generated model image begins with the garment photo you provide. A poorly lit image with a cluttered room, heavy shadows, or a partially hidden item gives the AI less useful visual information. Before generating anything, take one clear source photo that shows the garment’s front shape.
Recommended source-photo setup
- Lay the garment flat, hang it neatly, or photograph it against a plain background.
- Use even natural light or soft indoor lighting that shows the true color.
- Make sure sleeves, hems, collars, and straps are visible and not folded underneath.
- Fasten buttons, zip zippers, and arrange the item in its intended shape when possible.
- Remove distracting props, packaging, and unrelated clothing from the frame.
- Capture the full garment without cutting off key edges.
A simple front-facing hanger image is often a good starting point for structured clothing, such as blazers, button-down shirts, coats, and dresses. Flatlay photos can work well for T-shirts, knitwear, trousers, and casual items. For delicate or unusually shaped pieces, take extra care to show the real construction in supporting images.
Choose the Best Presentation for the Garment
A model photo generator is only one option in a broader clothing presentation workflow. The best format depends on what shoppers need to see first. Some garments benefit from a model image, while others are clearer as a ghost mannequin, flatlay, folded layout, or on-hanger photo.
| Presentation style | Best for | What it helps show | Important limitation |
|---|---|---|---|
| Generated model image | Style-led apparel and outfit context | Overall styling and intended silhouette | May not reflect exact fit on every body type |
| Ghost mannequin | Dresses, shirts, jackets, activewear | Garment structure without a visible person | Does not show real-world movement or fit |
| Flatlay | Knitwear, tees, trousers, sets | Color, graphic details, fabric surface | Can make volume and shape harder to judge |
| On-hanger photo | Most everyday resale items | Length, drape, neckline, and overall condition | May look less styled than a model image |
| Folded photo | Basics, denim, sweaters, packaged items | Neat inventory presentation and detail shots | Should not be the only view for fitted garments |
For a tailored blazer, a ghost mannequin image can often show the lapels, shoulder shape, and interior neckline more accurately than a highly stylized model scene. For a casual maxi dress, a model photo may be more useful for communicating how the garment could be styled. Consider using both formats when they each add different, honest information.
Use a Model Image Without Misleading Buyers
AI-generated fashion images should support clarity, not create uncertainty. A buyer should never have to guess whether a visible feature belongs to the actual garment. Keep the listing grounded in photographs of the original item, especially when selling pre-owned clothing.
Include these original photos in every listing
- A full front view of the actual garment
- A full back view
- Size, brand, and care labels where available
- Close-ups of fabric, prints, embroidery, hardware, or distinctive details
- Photos of wear, alterations, stains, pulls, fading, or repairs
- A measurement photo or written measurements for key areas
It is also wise to state when an image is AI-generated or digitally created, particularly if the marketplace, selling channel, or your audience expects disclosure. Clear communication helps buyers distinguish between a presentation image and the actual item photos.
Practical rule: If a customer needs the detail to decide whether to buy, show that detail in an original photo of the real garment.
A model generator cannot confirm an exact fit, recreate every wrinkle, or reliably represent subtle texture differences. It also cannot repair hidden defects, missing buttons, fabric thinning, odor, stretched elastic, or internal damage. Those are selling-condition issues that require inspection and accurate description.
A Concrete Example: Listing a Pre-Owned Midi Dress
Imagine you are listing a pre-owned black floral midi dress. The garment is in good condition, but it looks flat and slightly wrinkled on a hanger. You want an attractive lead image without hiding the real item.
- Photograph the actual dress on a plain hanger in even lighting, making sure the floral print, neckline, sleeves, and hem are visible.
- Take separate photos of the back, size tag, fabric label, zipper, and any signs of wear.
- Use a wrinkle-retouched version only if it still represents the garment honestly. Avoid smoothing the fabric so much that the material appears different from the original.
- Create a model-style image from the clean front garment photo to provide outfit context.
- Place the original garment photo, label photo, and condition photos directly after the generated presentation image.
- Write measurements such as pit-to-pit width, waist, length, and sleeve length in the description.
The resulting listing gives shoppers an appealing first impression while preserving the evidence they need to buy with confidence. The generated image communicates styling potential; the original images verify the actual dress.
Common Mistakes to Avoid
- Using only AI-generated images: Buyers need photos of the actual inventory item.
- Changing the garment’s apparent color: Always prioritize true-color source photos.
- Hiding condition problems: Editing should not remove stains, holes, pilling, fading, or other flaws from the item record.
- Assuming generated fit is exact: Model imagery is visual context, not a fit guarantee.
- Over-styling the image: Props, accessories, and dramatic poses can distract from the item being sold.
- Skipping measurements: Even a strong model image cannot replace garment measurements.
Build a Buyer-First Image Order
A useful apparel listing sequence balances inspiration and proof. For many sellers, a model-style image can work near the beginning, but it should be followed quickly by clear original photos. This order helps shoppers enjoy the visual presentation without losing access to practical details.
- Generated model image or clean hero image
- Original full front photo
- Original full back photo
- Close-up of fabric and key design details
- Label and size information
- Measurements and condition photos
For structured garments, consider adding a ghost mannequin image between the model image and the original photos. It can provide a clean, product-focused view that sits between lifestyle styling and straightforward resale documentation.
Final Thoughts on Model Photo Generators
A model photo generator can make clothing listings feel more polished, especially when you have limited time, limited modeling resources, or varied apparel inventory. The strongest results come from clean source photos, realistic expectations, and a listing structure that keeps the original garment at the center.
Use generated images to add styling context, not to make claims about exact fit, fabric texture, or condition. Combine them with clear flatlay, hanger, folded, or ghost mannequin views, plus thorough close-ups and measurements. For sellers exploring AI-assisted clothing presentation, Clothing Studio’s guide to ghost mannequin photos offers useful context on another clean way to display apparel; full app features are available through a subscription.
