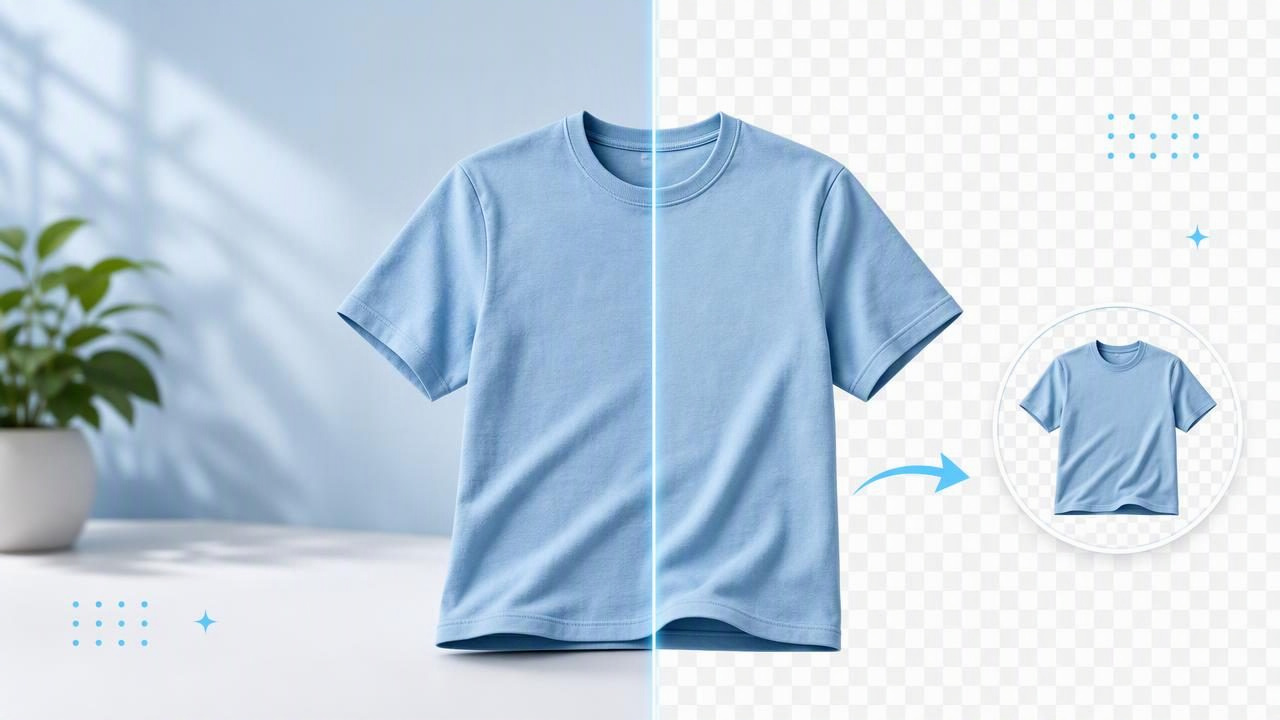
An instant clothing photo background remover can make apparel listings look cleaner, more consistent, and easier to browse. For fashion resellers, boutiques, and small brands, removing a distracting bedroom wall, carpet, rack, or uneven tabletop helps keep attention on the garment itself.
But clean background removal is not simply about pressing a button and publishing the result. Clothing has difficult edges: thin straps, sheer sleeves, lace, fringe, fuzzy knits, dark hems, and white garments photographed against pale walls can all challenge an automated edit. A strong workflow combines a clear original photo, thoughtful review, and a final image that represents the item honestly.
This guide explains how to get better results from background removal for clothing photos, what to check before uploading, and when a cutout may need adjustment rather than immediate use.
Why Background Removal Matters for Clothing Listings
Online shoppers cannot touch the fabric, inspect the seams in person, or see the garment from across a store floor. Your listing photos need to communicate shape, color, condition, and key details quickly. A simple background reduces visual noise and makes the item easier to evaluate.
For a seller with dozens of pieces to photograph, consistency is equally important. A catalog where every shirt appears against a similar clean backdrop often feels more organized than one where every image was taken in a different room or under different conditions.
Background removal can be especially useful for:
- Marketplace listings with mixed inventory from different sourcing days.
- Product grids where consistent thumbnail images matter.
- Flatlay, folded, and on-hanger presentations.
- Seasonal collections that need a unified visual style.
- Images with cluttered rooms, shadows from furniture, or distracting surfaces.
It does not replace accurate garment photography. Buyers still need clear images of the front, back, labels, fabric texture, measurements, wear, stains, repairs, or flaws. A removed background should improve presentation, not hide relevant information.
What an Instant Clothing Photo Background Remover Actually Does
Background-removal tools identify the main subject in an image and separate it from the surrounding scene. In apparel photography, the intended subject may be a single garment, a pair of shoes, a bag, or an outfit arranged on a flat surface. The tool then creates a cutout that can be placed on a plain color, transparent canvas, or another appropriate backdrop.
The word instant refers to the speed of the initial separation, not a guarantee that every image is ready without review. Automated tools can save substantial time, but clothing is not a simple geometric object. The final result depends on the original photo and the visual complexity of the garment.
| Photo element | Usually easier to isolate | May need closer review |
|---|---|---|
| Garment outline | Structured jacket on a contrasting wall | Black dress against a dark background |
| Edges | Solid cotton tee with clear sleeves | Lace, fringe, tulle, fur, or loose knit fibers |
| Separation from surface | Flatlay with visible space around the item | Garment overlapping other clothing or props |
| Lighting | Even light across the garment | Strong shadows, glare, or a blown-out white shirt |
Start With a Photo That Is Easy to Edit
The quickest path to a clean cutout begins before editing. A background remover can work with imperfect photos, but it generally has more information to work with when the garment is clearly separated from its surroundings.
Use contrast between the item and the background
A navy blouse against a pale neutral wall is easier to distinguish than the same blouse against a black chair. Similarly, a white sweater can lose edge detail against a bright white wall. You do not need an elaborate studio; a plain surface that contrasts with the garment is often enough.
Leave breathing room around the garment
Keep the full item inside the frame, including sleeve ends, hems, straps, and hanging tags if they are part of the listing. Leave a small margin around the outside. When a sleeve touches the image edge, it can be harder to tell whether the edge is intentional or cropped.
Use even, honest lighting
Soft, even lighting helps preserve the visible outline and true color of the garment. Avoid heavy backlighting that turns edges into glare, as well as dramatic shadows that visually merge with sleeves or hems. Photographing near indirect daylight can work well, provided the color remains accurate.
Keep unrelated objects away
Hands, hangers, clips, nearby garments, packaging, and furniture may confuse the intended cutout. If you are photographing on a hanger, ensure the hanger is either deliberately included or clearly separated from the garment. Do not assume an automated edit will always know which object should remain.
A Practical Workflow for Cleaner Clothing Cutouts
- Photograph the garment clearly. Capture the full front view first, then take detail images separately for labels, fabric, closures, and flaws.
- Choose the main listing image carefully. Use a photo where the garment has a clear silhouette and is not overlapped by other objects.
- Remove the background. Select a simple background that supports the garment rather than competing with it. White, light gray, or a restrained neutral tone can work well when it matches your catalog style.
- Inspect the perimeter at full size. Look at collars, cuffs, straps, pockets, hems, and any decorative trim. These areas often reveal cutout errors first.
- Compare the result with the original. Confirm that the neckline, sleeve shape, edges, and visible details still match the source image.
- Review it as a shopper would. Ask whether the image clearly communicates what is included, how the item is positioned, and whether any important condition details need separate photos.
Concrete Example: Editing a Black Lace Dress
Imagine you have sourced a black lace midi dress and photographed it on a hanger against a beige wall. The photo is well lit, but the lace sleeves have delicate scalloped edges and the hanger hook blends slightly into the dark neckline.
After using an instant clothing photo background remover, the central body of the dress may look clean against a light neutral background. Before posting, inspect the result closely. Check whether the scalloped sleeve edge remains visible, whether gaps within the lace have been treated naturally, and whether the hanger is still present where you intended it to be.
If the lace edge looks simplified, do not present the edited image as a perfect representation of the fabric detail. Keep an original close-up of the sleeve and include it among the listing images. If the dress is intended to be shown on a hanger, retain a believable hanger presentation rather than removing parts in a way that makes the neckline look structurally unclear.
A polished main image should make a garment easier to see, while detail photos should make it easier to assess.
Common Background Removal Problems and How to Handle Them
Missing straps, hems, or fine edges
Thin garment features can disappear when they blend into the original background. Retake the photo with stronger contrast if possible, or choose a different source image with a clearer outline. Do not rely on an edit that removes a meaningful part of the garment.
Unnatural cut lines around fabric texture
Textured fabrics such as boucle, crochet, faux fur, and fringe may appear slightly smoothed or clipped around the outer edge. Use detailed original photos to show the real material. Background cleanup can improve the main presentation, but it should not be used to claim exact texture preservation.
Floating or inconsistent shadows
A garment can look disconnected from the frame if the edit leaves a partial shadow or removes one unevenly. For a clean catalog look, consistency matters more than adding dramatic effects. Compare several listing images together before publishing.
Colors that look different after editing
Always compare the finished image with the original garment under good light. If the edit makes a charcoal item look black or shifts a cream tone toward bright white, use the more accurate image and describe the color carefully in the listing.
Choose the Right Background for the Sales Channel
The best replacement background depends on where shoppers will see the image and how your existing catalog looks. In most cases, simplicity is the safest choice. A clean background lets the clothing silhouette and color remain the focus.
- White: A classic choice for a bright, product-focused catalog.
- Light gray: Helpful when white garments need a little more separation.
- Soft neutral: Useful for a warmer visual identity without overpowering the product.
- Transparent: Practical when your selling platform or design workflow adds its own background later.
Avoid using a replacement setting that implies something untrue about the product. For example, a dramatic model-like background should not make shoppers assume the garment comes with accessories, has a particular fit, or was photographed in a physical location that it was not.
Background Removal Is One Part of Clothing Presentation
A clean cutout is useful, but it is only one presentation option. Flatlays can show proportions and styling. Folded images can communicate texture and storage-friendly details. On-hanger photos can show drape. Ghost mannequin images can create a more dimensional view of a garment’s interior shape, while still requiring careful comparison with the original item.
For sellers building a repeatable process, use the format that makes the garment easiest to understand. A structured blazer may benefit from a front-facing hanger or ghost mannequin presentation, while a graphic sweatshirt may be clear and effective as a simple flatlay. Include multiple views when one image cannot explain the item fully.
Final Checklist Before Publishing
- Is the entire garment visible and correctly outlined?
- Do the collar, sleeves, hem, straps, and trim match the original photo?
- Does the background support the item without distracting from it?
- Have you included unedited detail photos for texture, labels, and condition?
- Does the listing avoid hiding flaws or implying an inaccurate fit?
- Does the image style match the rest of your shop or collection?
For sellers who also want to explore hollow apparel presentation, Clothing Studio offers a useful guide to ghost mannequin photos that explains how this format differs from a standard background-removed clothing image.
Used thoughtfully, an instant clothing photo background remover can help create a faster, cleaner e-commerce photography workflow. The strongest results still come from clear source photos, consistent review, and an honest presentation that lets shoppers see what they are buying.
