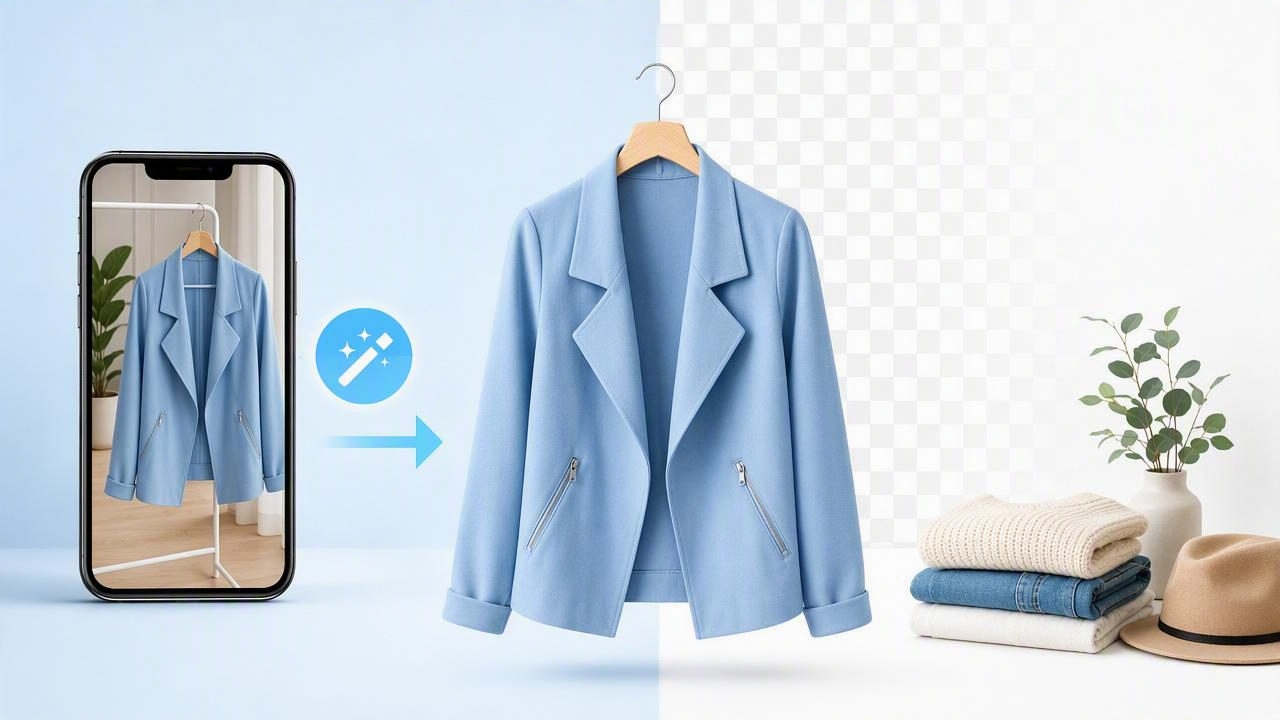
For fashion resellers, boutique owners, and e-commerce brands, a strong product photo can make the difference between a scroll and a sale. Buyers want to see color, texture, fit, and condition quickly. A cluttered bedroom, busy rack, uneven wall, or distracting floor can pull attention away from the item itself.
That is where a remove background app becomes useful. Instead of setting up a studio for every item, sellers can capture a clear clothing photo and replace the original setting with a clean, consistent background. When used well, background removal helps listings look more professional while keeping the garment as the focus.
This guide explains how to use a background removal app for clothing photos, what makes a good source image, which backgrounds work best, and how to avoid editing mistakes that can reduce buyer trust.
Why Background Removal Matters for Clothing Listings
Online shoppers cannot touch a garment, inspect the fabric in person, or see how it looks from across a room. Photos have to do much of that work. Clean e-commerce photography helps buyers understand what they are purchasing without visual distractions.
A consistent background can improve clothing presentation in several ways:
- It keeps attention on the garment. Buyers notice the neckline, print, sleeves, hem, and condition more easily.
- It creates a more cohesive storefront. Similar listing images make a resale closet or brand page look organized.
- It reduces visual clutter. Hangers, furniture, laundry piles, and wall decor do not compete with the item.
- It supports marketplace-ready formatting. Many selling platforms favor clear, well-lit product images with simple backgrounds.
- It saves time. A good app can remove a background faster than manually tracing every edge in a desktop editor.
Background removal is especially valuable for sellers who photograph items at home, source inventory in batches, or need to post new listings regularly. It gives a small operation a more repeatable visual process without requiring a permanent photo studio.
What a Remove Background App Does
A remove background app identifies the main subject in an image and separates it from the surrounding area. For a clothing listing, the subject may be a shirt on a hanger, a folded sweater, jeans laid flat, shoes, or a garment worn by a model.
Most modern tools use AI photo editing to detect edges automatically. The app creates a cutout of the item, often with a transparent background, and lets you place the cutout onto a white, neutral, or custom backdrop.
For clothing sellers, the goal is not simply to erase everything behind the garment. The goal is to create an image that looks natural, accurate, and easy for a buyer to read.
Background Removal vs. Cropping
Cropping removes parts of an image around the edges. Background removal isolates the garment itself. Both are useful, but they solve different problems.
| Editing method | Best for | Limitation |
|---|---|---|
| Crop | Removing excess empty space or straightening composition | Cannot remove clutter directly behind clothing |
| Background removal | Creating a clean, uniform backdrop around the garment | Needs a clear original image for accurate edges |
| Manual retouching | Fixing small missed areas or edge details | Can be slow for high-volume listing workflows |
Start with a Better Original Photo
Even the best remove background app works more reliably when the starting photo is clear. AI can help, but it cannot always recover details that are blurred, hidden in shadows, or blended into a similar-colored wall.
Before you remove the background, follow these practical photo guidelines:
- Use bright, even light. Natural window light or soft indoor lighting helps show the true color and reduces harsh shadows.
- Create contrast between the garment and its surroundings. Photograph a black dress against a lighter wall, or use a darker surface for a white blouse.
- Keep the entire item in frame. Avoid cutting off sleeves, hems, straps, or important design details.
- Use a simple temporary backdrop when possible. A plain wall, foam board, or clean sheet makes automatic detection easier.
- Hold the camera steady. Sharp edges are easier to separate than blurry ones.
- Check for overlaps. Hair, hands, furniture, or nearby garments can confuse the selection process.
For example, if you photograph a cream knit cardigan against a cream wall, the app may struggle to distinguish the outer edges. Moving the garment in front of a medium-gray or darker background can create a much cleaner result in seconds.
Step-by-Step: How to Remove a Background from Clothing Photos
While each app has a slightly different interface, the overall workflow is similar. Use this process for individual listings or a batch of inventory.
1. Choose the Best Image First
Take several photos before editing, then choose the clearest front-facing shot. Make sure the garment is centered and the fabric is not heavily shadowed. If you need to show both front and back, edit each view separately rather than trying to combine multiple angles into one image.
2. Upload the Photo to the App
Open your chosen remove background app and upload the image from your camera roll. Let the automatic tool process the photo. In many cases, it will detect the clothing item within moments.
3. Inspect the Edges Carefully
Do not export immediately. Zoom in around areas where clothing edges are complex, including:
- Fringe, tassels, lace, and crochet
- Thin straps and belt loops
- Ruffles and layered hems
- Sheer sleeves or mesh panels
- Fur trims and textured knits
If the tool removes part of the item or leaves a halo from the old background, use the restore or erase brush if available. Small corrections can make a major difference in how polished the final listing appears.
4. Select a Background That Fits the Listing
A plain white background is a dependable choice for many product listings because it looks clean and helps colors stand out. Soft gray, light beige, and pale neutral tones can also work well, especially for light-colored garments that may disappear on pure white.
Choose backgrounds that support the item rather than overpower it. A bold pattern, fake luxury interior, or dramatic scenery may look eye-catching, but it can distract from the garment and make the listing feel less consistent.
5. Adjust Size, Position, and Shadows
Center the garment and leave enough breathing room around it. Avoid enlarging the item so much that sleeves or hems nearly touch the frame. If the app offers a subtle shadow option, use it lightly. A gentle shadow can prevent the clothing from looking like it is floating, but a dark or oversized shadow can look artificial.
6. Export at Good Quality
Save the final image at a resolution that looks sharp on mobile screens. Avoid repeatedly downloading, editing, and re-uploading the same compressed file, as this can reduce detail. Keep the original photo too; it is useful if you need to create another version later.
Choosing the Right Background for Different Clothing Types
The best background depends on the item, its color, and how you want the product to feel. Consistency matters more than using one background in every situation.
| Clothing type | Recommended background | Why it works |
|---|---|---|
| White or cream garments | Light gray, beige, or pale blue | Preserves edge definition |
| Dark garments | White or light neutral | Creates strong contrast |
| Bright prints | White or soft gray | Lets the print remain the focal point |
| Vintage pieces | Warm neutral | Can complement texture without looking busy |
| Luxury basics | Clean white or subtle gray | Creates a refined, catalog-like appearance |
Common Background Removal Mistakes to Avoid
Using a remove background app is fast, but fast editing should still be reviewed. Buyers may not know why a photo looks off, but they can sense when an item has been edited too aggressively.
- Removing real garment details. Do not erase sheer fabric, loose ties, or thin straps by accident.
- Changing the item’s color. Background edits should not alter the true shade of the clothing.
- Using unrealistic shadows. Heavy shadows and glowing outlines can make the image look pasted together.
- Over-smoothing fabric. Wrinkles can be softened when needed, but texture and garment condition should remain honest.
- Using a different style for every listing. A mix of white cutouts, colorful scenes, and dark backgrounds can make a storefront feel scattered.
- Replacing every photo. Use a clean background for your primary image, but include detail photos of tags, fabric, flaws, measurements, and labels.
The best clothing photo edits make the item easier to evaluate, not harder to trust.
Build a Faster E-Commerce Photography Workflow
Background removal becomes more valuable when it is part of a repeatable listing routine. Instead of photographing and editing one item from start to finish, try working in batches.
- Steam or straighten a group of garments.
- Photograph each item in the same well-lit area.
- Select the strongest front image for each listing.
- Use background removal and apply the same background style.
- Add detail photos showing labels, fabric, measurements, and flaws.
- Write listings and upload images in one session.
This approach reduces decision fatigue and helps maintain visual consistency. It also makes it easier to spot issues early, such as a background that is too similar to a garment or an image that needs better lighting.
When to Use Ghost Mannequin Images Instead
A background-free flat lay or hanger photo is excellent for many listings. However, some pieces benefit from a ghost mannequin presentation. This style removes the mannequin or model while retaining the garment’s shape, neckline, drape, and structure.
Ghost mannequin images can be especially helpful for blazers, dresses, fitted tops, jackets, and garments where buyers need a clearer sense of form. They are not always necessary for casual basics, folded knitwear, or simple accessories, but they can elevate the presentation of structured pieces.
Whichever approach you choose, accuracy should come first. Show the item’s real silhouette, include multiple views, and disclose flaws clearly in both photos and descriptions.
Final Thoughts
A remove background app can help sellers create cleaner, more consistent clothing listings without complicated editing software. Start with a well-lit photo, review the garment edges, choose a neutral backdrop, and keep the final image honest to the item being sold.
For fashion resellers who want to streamline background removal alongside clothing-focused editing tools such as wrinkle cleanup, ghost mannequin images, and model shots, Clothing Studio is one option designed around that workflow.