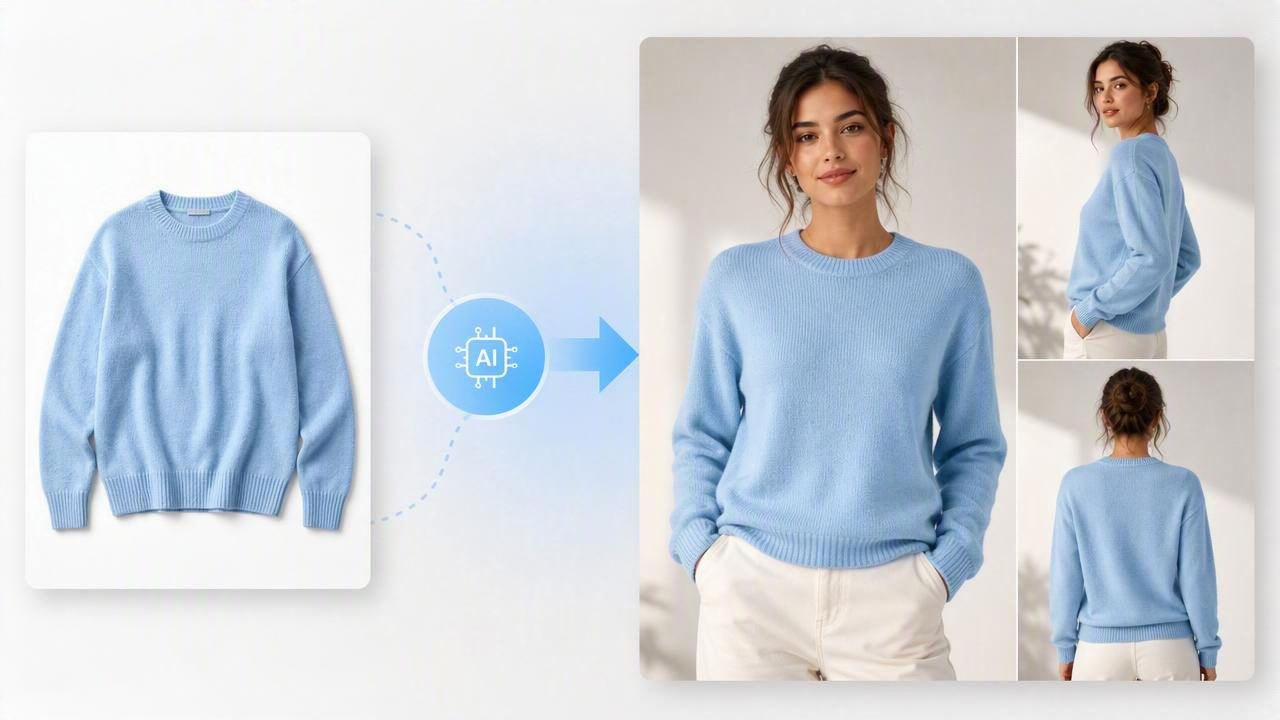
Learning how to turn clothing photos into model shots can help fashion resellers and brands present garments in a more relatable way. A model-style image gives shoppers quick context for how a dress, jacket, or top may look when worn, which can make a listing feel more complete than a simple folded or hanger photo alone.
However, a polished model image should support accurate product presentation—not replace it. The original garment photo remains important for showing the real item, including its fabric, condition, color, measurements, texture, and any visible wear. The strongest e-commerce photography approach combines clean source photos with carefully reviewed model-style visuals and clear listing details.
This guide explains how to prepare clothing images, choose the right garment presentation, create useful model shots, and avoid common accuracy issues before publishing an online listing.
Why Turn Clothing Photos Into Model Shots?
Online shoppers cannot touch a garment, try it on, or assess its drape in person. Model shots can provide visual context that a flatlay or on-hanger image may not communicate as quickly. For example, shoppers can better understand the approximate length of a blazer, the neckline of a top, or whether a skirt is intended to sit high on the waist.
Model imagery can be especially useful for:
- Fashion listings with limited original lifestyle photography
- Resale inventory photographed on a hanger or flat surface
- Catalogs that need a more consistent visual style
- Items where silhouette and styling are major buying considerations
- Marketplace listings where the first image needs to communicate the product quickly
Still, model shots should be viewed as presentation images. They are not reliable proof of exact garment fit, fabric thickness, stretch, or condition. Include original photos alongside them so buyers can inspect the actual item.
Start With a Clean, Accurate Garment Photo
The quality of the source image affects the usefulness of any edited clothing presentation. Before attempting to create a model-style image, photograph the item in a way that makes its shape and details easy to see.
Use Even Lighting
Soft, indirect daylight or consistent indoor lighting helps prevent harsh shadows and color casts. Avoid mixing warm and cool light sources, which can make white clothing look yellow, blue, or gray. If the garment is black, dark navy, or richly textured, add enough light to retain visible seams and fabric detail.
Show the Full Garment
Lay the garment flat, hang it neatly, or photograph it on a mannequin. Make sure hems, sleeves, shoulders, and waistlines are visible. Avoid cropping out a key area such as the lower hem of a dress or the edge of a jacket sleeve.
Reduce Distracting Wrinkles Before Photography
Steam or gently smooth the item when possible. Light wrinkles can distract from the garment’s intended silhouette, while deep creases may make an item look poorly stored. Do not attempt to conceal damage, pilling, stains, pulls, or wear through editing. Those details should be photographed and disclosed clearly.
Capture Essential Detail Images
Even if a model shot becomes the lead image, take supporting photos of:
- Front and back views
- Brand, size, and care labels
- Fabric texture and pattern close-ups
- Buttons, zippers, pockets, and trim
- Any flaws or signs of prior wear
These original images help set realistic expectations and give customers the information they need to buy confidently.
Choose the Best Source Layout for the Garment
Not every garment presentation produces the same result. The right starting layout depends on the item’s structure, fabric, and selling purpose.
| Source photo style | Best for | What to watch for |
|---|---|---|
| Flatlay | T-shirts, knitwear, casual dresses, simple separates | Keep sleeves and side seams symmetrical |
| On-hanger | Blouses, jackets, coats, dresses | Use a hanger that does not distort shoulders |
| Ghost mannequin | Structured apparel and catalog-style listings | Check collar, armholes, and inner garment areas |
| Folded | Sweaters, denim, basics, multi-item bundles | May not show the full silhouette clearly |
| Original worn photo | Items photographed on a real person | Ensure permission and accurate representation |
A structured blazer, for instance, benefits from an on-hanger or ghost mannequin source because the shoulders, lapels, and button placement are already visible. A soft knit dress may work well as a neat flatlay, provided the garment is arranged to show its actual shape rather than stretched or pinned into an unrealistic silhouette.
A Practical Example: Turning a Hanger Photo Into a Model-Style Image
Imagine you are listing a women’s long-sleeve linen midi dress. Your original photo shows the dress on a plain hanger against a clean wall. The garment has a V-neck, button front, waist tie, and slightly wrinkled linen texture.
Before creating a model-style visual, review the original photo. Straighten the hanger, make sure the waist tie is visible, and take separate close-ups of the buttons, fabric, tag, and hem. If the linen has natural wrinkles, retain enough of that texture to keep the presentation realistic. Linen is expected to have some variation and creasing; removing every crease can make the material look unlike the actual garment.
For the model image, the goal is to communicate the overall styling and length of the dress. When reviewing the output, compare it against the original garment photo:
- Check that the V-neckline remains the same shape.
- Confirm the button placement and number are not changed.
- Look at sleeve length, waist-tie position, and skirt length.
- Make sure the color has not shifted noticeably.
- Check that prints, stripes, and seams do not become distorted.
If the generated image changes a feature that matters—such as adding pockets, altering the neckline, lengthening the skirt, or making the dress appear more fitted—do not use it as the only product reference. Keep the original front and back photos in the listing, and choose a different presentation image if the mismatch is substantial.
How to Make Model Shots Useful for Shoppers
The best model-style clothing photos answer a shopper’s most immediate questions without creating misleading expectations. They should emphasize the garment while remaining consistent with the real item.
Keep the Garment as the Main Subject
Avoid overly dramatic poses, busy settings, or accessories that hide the product. A simple upright pose with the front of the garment visible is often the most practical first image. For a jacket, include one front-facing view and one angle that shows sleeve shape or lapels. For trousers, make sure the waistband and leg shape are visible.
Use a Consistent Listing Sequence
A clear photo order helps customers compare a styled image with the actual item. A practical sequence could be:
- Model-style image showing the overall silhouette
- Original full front garment photo
- Original back garment photo
- Close-up of fabric and key details
- Label and size photo
- Clear flaw photos, if applicable
This approach uses the model shot to attract attention while preserving transparency through the original images.
Match the Listing Copy to the Photos
Use the written description to reinforce what shoppers can verify. State the labeled size, provide measurements, identify the fabric when known, and describe the condition honestly. Avoid statements such as “fits exactly like shown” when the model image is generated or when measurements are unavailable.
Instead, write specific details such as: “Tagged size medium. Pit-to-pit measures 19 inches laid flat. Linen blend with natural texture and light wrinkling. Please review original photos for color and condition.”
Common Problems When Creating Model-Style Clothing Images
AI photo editing can streamline fashion reselling workflows, but every output needs review. The following issues are common enough to check before publishing.
- Changed garment details: Buttons, pockets, closures, necklines, or patterns may appear different from the source.
- Incorrect proportions: A garment can look longer, shorter, tighter, or looser than it truly is.
- Fabric inaccuracies: Texture may appear smoother, thicker, shinier, or less transparent than the actual material.
- Color shifts: Lighting and processing can make shades look warmer, cooler, brighter, or more saturated.
- Hidden condition issues: Editing should never remove or obscure stains, holes, fading, or damage that buyers need to know about.
- Unrealistic styling: Added layers or accessories can imply that items are included when they are not.
These limitations are why comparison with the original garment image matters. A model image can illustrate a possible presentation, but it cannot guarantee exact fit simulation or perfectly preserve every subtle fabric characteristic.
When a Ghost Mannequin May Be a Better Choice
For some listings, a ghost mannequin image may be more useful than a full model shot. This style creates the appearance of a garment being worn without showing a person, helping buyers focus on construction, shape, and details such as collars, necklines, shoulders, and sleeves.
Ghost mannequin presentation is particularly effective for shirts, outerwear, activewear, and structured dresses. It can offer a clean catalog-like look while reducing distractions. It is still important to compare the final image to the original item, especially around inner neck areas, armholes, linings, and edges where visual changes can occur.
Final Checklist Before You Publish
- Does the model-style image match the real garment’s major design details?
- Are original garment photos included in the listing?
- Are measurements, size information, and condition described accurately?
- Have you disclosed visible flaws rather than editing them away?
- Does the image avoid implying that accessories or styling pieces are included?
- Is the first image clear, well-lit, and focused on the item for sale?
When used thoughtfully, model-style visuals can improve clothing presentation and help shoppers understand a garment at a glance. For sellers who also need clean apparel cutouts and catalog-style presentation, Clothing Studio’s guide to ghost mannequin photos offers additional context on presenting garments while keeping the item itself central. Review every edited image against the original, and let accurate photos and descriptions do the work of building buyer confidence.
