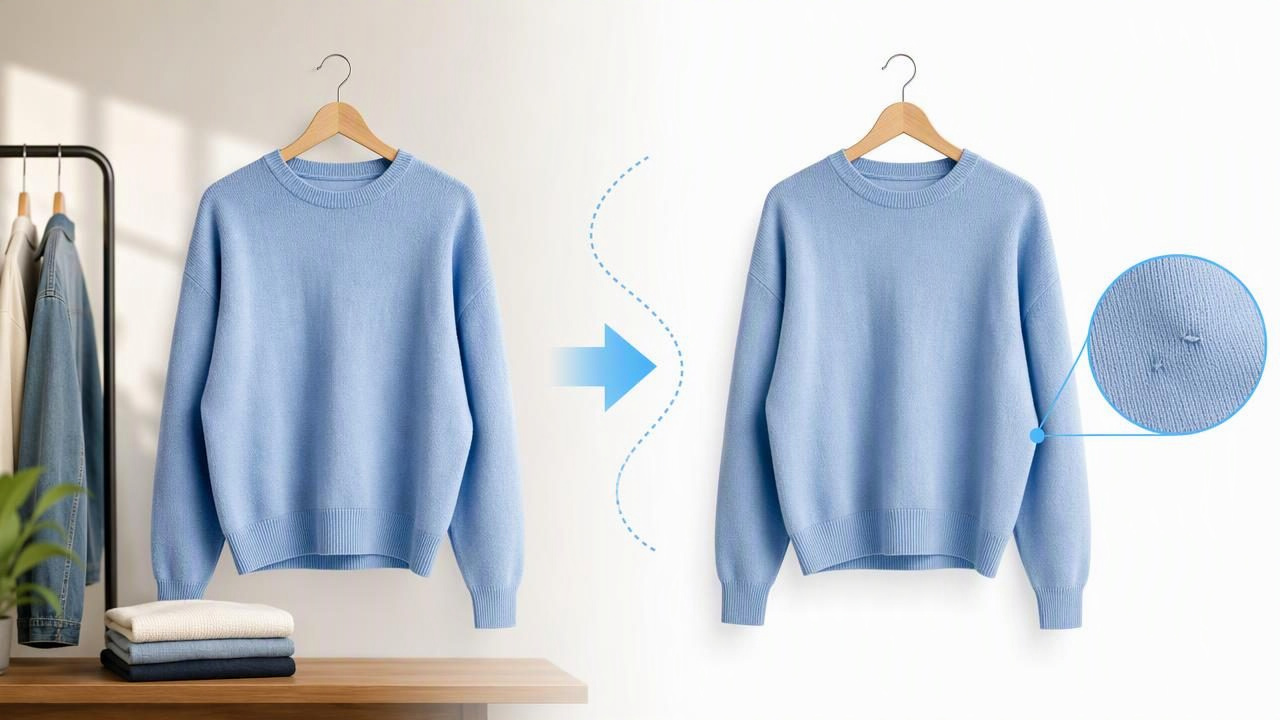
Learning how to remove a photo background can make a clothing listing look cleaner, more consistent, and easier for shoppers to assess. For fashion resellers and small brands, background removal is especially useful when inventory is photographed in different rooms, on different days, or with limited space. A simple, neutral background can shift attention back to the item: its silhouette, color, neckline, fabric, and condition.
However, a clean result should still be an honest result. Background editing should not change the garment’s fit, hide damage, erase important texture, or make colors appear more flattering than they are. The goal is not to create a fictional product photo. It is to present the real garment with fewer distractions.
This guide explains when to remove a background from clothing photos, how to capture an image that edits well, what to check after editing, and how to use the final photo alongside detail images that give buyers confidence.
Why remove the background from clothing photos?
Online shoppers make quick decisions. If a product is surrounded by a cluttered bedroom, busy wall pattern, laundry pile, or uneven floor, the garment may be harder to evaluate at a glance. Removing the original background can help create a focused product image for resale marketplaces, social storefronts, brand catalogs, and e-commerce product pages.
A plain white, light gray, or soft neutral background can be particularly helpful when you want listings to look consistent across a shop. It can also make it easier for a buyer to compare several colors or styles from the same seller.
- Clearer first images: The item becomes the obvious focal point in search results.
- More consistent storefronts: Listings photographed in varied locations can share a similar presentation.
- Less visual distraction: Hangers, walls, furniture, and floors do not compete with the garment.
- Better silhouette visibility: Hemlines, sleeves, collars, and overall shape are easier to see.
- Flexible use across channels: A clean cutout can support product pages, social posts, and promotional graphics.
Background removal is most effective when it supports the image rather than becoming the image. A buyer should still be able to understand how the item is photographed and what condition it is in.
Choose the right clothing photo before editing
The quality of your original photograph has a major effect on the final result. Even a strong background removal tool cannot reliably recover detail that is hidden by dark shadows, motion blur, severe overexposure, or a garment that blends into its surroundings.
Before you remove a photo background, choose an image where the clothing is clearly separated from the scene. A dark navy blouse against a dark navy wall, for example, may produce uneven edges around the sleeves. A white sweater against a bright white curtain may lose definition along the shoulder line.
A better starting image has these qualities
- The entire garment is visible, including cuffs, hems, straps, and side edges.
- Lighting is even enough to show the true color and surface details.
- The item contrasts with the original background.
- The camera is steady and the photo is in focus.
- Hands, clips, tags, and props are either intentional or kept out of the frame.
- The garment is arranged neatly but not stretched into a misleading shape.
If you are photographing on a hanger, leave a little space around the shoulders and sleeves. If you are using a flat lay, smooth the garment enough to show its shape while avoiding aggressive pulling that could distort the fit. For a mannequin image, make sure key edges such as armholes, collars, and side seams are well lit.
How to remove a photo background without losing garment detail
Automatic background removal can save time, but it should be treated as the first pass rather than the final decision. Clothing has complex edges: loose knits, lace, fringe, sheer panels, ruffles, fur trim, thin straps, and hanging belts can be difficult for any automated selection process. Review the edited result at a larger size before publishing.
- Start with the clearest full-garment image. Select a photo where the edges of the item are visible and not blocked by furniture, fingers, or deep shadows.
- Remove the background. Use a photo editor to isolate the garment from the original scene.
- Pick a restrained replacement background. White or a soft neutral tone usually keeps the focus on the clothing. Avoid dramatic scenes or colors that could alter how the garment appears.
- Inspect the outline. Zoom in around straps, sleeves, hems, collars, buttons, and textured trim. Look for missing sections, halos, jagged edges, or areas where the background remains visible.
- Compare against the original photo. Confirm that the garment color, print, length, and visible condition have not changed.
- Use supporting photos. Keep at least one unedited or minimally edited image, plus close-ups of labels, fabric, measurements, wear, or flaws when relevant.
This comparison step matters because a polished cutout can sometimes make subtle issues less obvious. If a sweater has pilling, a small stain, a repaired seam, or a snag, show it clearly in another listing image and describe it accurately. Background removal should improve presentation, not conceal condition.
Concrete example: editing a black dress photographed in a bedroom
Imagine you are listing a black midi dress that was photographed on a wooden hanger against a pale patterned bedroom wall. The wall pattern pulls attention away from the dress, and a nearby lamp creates a slight shadow on one sleeve.
After removing the photo background, place the dress on a light neutral background. The cleaner setting makes the neckline, waist seam, and skirt shape easier to notice. But before using it as the cover image, inspect the result closely. Because the dress is black, the editor may soften the edge of the hem or lose a thin hanging tie. The shadow on the sleeve may also make that area look darker than the rest of the dress.
In this situation, use the edited image as a clean overview, then add original-detail images that show the fabric, sleeve area, care label, and any wear. If the hem edge looks incomplete after editing, choose another original photo or retain a natural background rather than publishing an inaccurate cutout.
Useful rule: If an edit makes a buyer less able to judge the item, it is not an improvement for a resale listing.
Background choices for different clothing presentations
The best background depends on how the garment is displayed. Consistency matters, but so does preserving an understandable silhouette.
| Presentation style | Best use for background removal | Important check |
|---|---|---|
| On hanger | Useful for quick, consistent full-length listing images. | Keep hanger and straps intentional; inspect shoulder edges. |
| Flat lay | Helpful when floors, beds, or tabletops look distracting. | Ensure sleeves, hems, and folds are not accidentally cut off. |
| Folded clothing | Useful for sweaters, jeans, and stacked items with clean shape. | Do not edit away labels, texture, or visible wear. |
| Mannequin | Can create a clean catalog-style look around the figure. | Check armholes, necklines, and fit areas for unnatural edges. |
| Ghost mannequin | Works well when interior structure and shape need to be shown. | Review inner neck, sleeves, and seams for believable continuity. |
Do not assume every item needs the same treatment. A structured blazer may benefit from a clean mannequin or ghost mannequin presentation, while a vintage knit with visible texture may be more trustworthy in a well-lit natural photo with a simple real backdrop.
Common background removal mistakes to avoid
1. Using a replacement background that changes perceived color
A saturated backdrop can make a cream blouse appear warmer, a gray jacket appear cooler, or a bright garment look more intense. Choose neutral backgrounds and check the final image against the original under similar screen brightness.
2. Leaving white halos around dark garments
Light outlines are common around black, navy, and deep brown clothing. They can make the product look pasted onto the page. Zoom in around the garment and choose a cleaner source image if the edge cannot be represented accurately.
3. Removing texture by over-smoothing
Natural wrinkles, ribbing, denim grain, knit texture, and embroidery can help buyers understand the fabric. Light presentation cleanup is different from flattening a garment until its material looks unreal. Never imply a fabric is smooth, flawless, or new when the original photo shows otherwise.
4. Relying on one edited image
A cover photo is only part of a useful listing. Add front, back, label, fabric, and flaw photos where appropriate. Include measurements in the description for garments where fit is especially important.
When not to remove the background
There are times when leaving the original setting is the better choice. If the garment has transparent layers, intricate fringe, very fine lace, or an edge that cannot be isolated cleanly, a simple real-world background may communicate the product more accurately. The same applies when a cutout removes visible fabric detail or creates an unnatural silhouette.
Also avoid background removal when it could confuse buyers about what is included. For example, if a scarf is styled with a jacket but sold separately, photograph them clearly and state that the scarf is not included. A minimal background does not replace clear listing information.
Create a trustworthy final listing image set
Your first image should make the item easy to recognize. Your remaining photos should answer the questions that a clean background cannot: What does the fabric look like up close? Is there stretching, pilling, fading, or wear? What is the label size? How long are the sleeves or inseam?
A balanced listing photo set might include:
- One clean full-garment image with the background removed.
- One original or minimally edited front view for color comparison.
- One back view.
- Close-ups of fabric texture, print, hardware, and labels.
- Clear photographs of any flaws or repairs.
- A measurement image when useful for the garment type.
This approach gives you the visual consistency of e-commerce photography without sacrificing transparency. Shoppers are more likely to trust listings that look organized while still showing real evidence of the item’s condition.
Final takeaway
To remove a photo background successfully, start with a clear image, use a neutral replacement, inspect every clothing edge, and compare the result with the original garment photo. The best edit makes a listing easier to browse while keeping color, texture, construction, and condition truthful.
For sellers working with hanger, flat lay, or mannequin photos, Clothing Studio’s guide to ghost mannequin photos offers additional context on presenting garment shape while reviewing the final image carefully.
