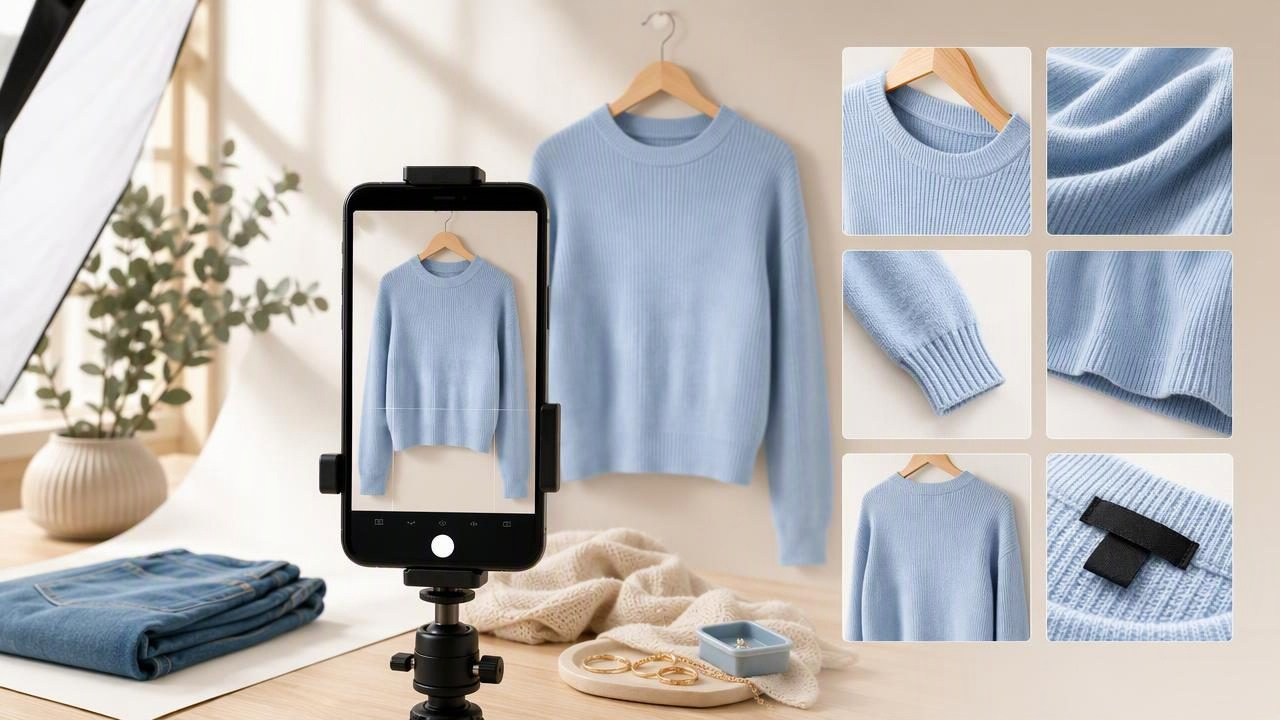
Learning how to make product photos for Poshmark is one of the most practical ways to improve a clothing listing before you write a single word of the description. Buyers cannot touch the fabric, inspect the fit in person, or see the garment from every angle. Your photos must do that work for them.
Strong Poshmark photos do not require a professional studio or expensive camera equipment. They do require clear light, intentional styling, accurate color, and enough visual detail for a shopper to feel confident about what they are considering. Whether you sell occasional closet cleanout pieces or run a larger fashion resale business, a repeatable photo process can make listings look more organized and trustworthy.
This guide explains how to photograph clothing for Poshmark, choose the best presentation style, create a reliable shot list, and edit images without making the item look misleading.
Why Product Photos Matter on Poshmark
When shoppers scroll through search results, your cover photo is competing with many other listings for attention. A bright, uncluttered, well-framed image makes it easier for someone to understand the item quickly. That first image may earn the click, but the rest of your photo set helps answer the questions that determine whether a buyer moves forward.
Good e-commerce photography should help a buyer identify:
- The garment type, brand style, color, and overall silhouette.
- The condition of the item, including visible wear or flaws.
- Important material details, such as knit texture, embroidery, buttons, or lining.
- How the item is shaped when worn, hung, folded, or laid flat.
- Useful sizing information from the tag and measurements.
Photos should make an item look appealing, but accuracy matters just as much. Avoid editing that changes the true garment color, hides stains, removes pilling, or implies a fit that the item cannot actually provide. Clear visual disclosure helps set realistic expectations and can reduce avoidable buyer questions.
Start With a Clean, Prepared Garment
The easiest editing problem to solve is the one you prevent before taking the photo. Take a few minutes to prepare each piece. Remove lint, fasten buttons, close zippers, straighten collars, and check that pockets sit flat. For shoes, wipe off dust and photograph the soles. For handbags, reshape them gently and empty the interior unless an included insert is part of the sale.
Wrinkles deserve particular attention because they can make an otherwise excellent item look neglected. Steam or lightly press a garment when the care label allows it. If some creasing remains, subtle wrinkle retouching can improve presentation, but it cannot replace proper preparation. Deep creases, stretched fabric, faded areas, and damage may still be visible after editing.
Practical rule: Prepare the item as though a buyer will inspect it in person immediately after opening the package.
Choose the Best Clothing Presentation Style
There is no single correct way to photograph every garment. The best setup depends on the item’s shape, structure, and key selling points. Consistency across your closet is helpful, but do not force every item into the same format if it prevents buyers from seeing important details.
| Presentation Style | Best For | What It Shows Well |
|---|---|---|
| Flat lay | T-shirts, sweaters, denim, casual dresses | Prints, measurements, overall shape |
| Hanger photo | Blouses, jackets, coats, dresses | Length, drape, neckline, sleeves |
| Ghost mannequin | Structured tops, dresses, outerwear | Garment silhouette and interior neckline |
| Folded photo | Jeans, activewear, knitwear, sets | Texture, labels, compact presentation |
| Model or try-on photo | Pieces where proportion is important | General styling and visual scale |
A ghost mannequin image can be especially useful for clothing that needs more dimension than a flat lay provides. It creates the appearance of a garment being worn without showing the mannequin itself. However, it should be treated as a presentation image rather than proof of exact fit. The result cannot guarantee how an item will fit every body shape, and it should not conceal alterations, stretched areas, or flaws.
Create a Simple, Consistent Photo Setup
You can make product photos for Poshmark in a small area of your home with a few basics: a clean wall or backdrop, window light or soft lamps, a hanger or flat surface, and a phone camera. The goal is not a dramatic editorial image. The goal is a clear, consistent item photo that puts the clothing first.
Use soft, even lighting
Indirect daylight near a window is often a reliable option. Place the garment facing the light, rather than placing the window directly behind it. Backlighting can turn the item into a dark silhouette and make colors difficult to judge. If daylight is unavailable, use two soft light sources from either side to reduce harsh shadows.
Before photographing a full batch, check the color on your screen. White clothing can appear blue or yellow under certain lights, while black garments can lose detail in deep shadows. Adjust the setup rather than relying on extreme edits later.
Keep the background quiet
A plain wall, foam board, seamless paper, or clean floor can work well. Avoid busy bedsheets, cluttered rooms, patterned rugs, and distracting decorations. A neutral background makes the product easier to see and creates a more cohesive appearance across your Poshmark closet.
Background removal can help create a cleaner listing image when the original setting is distracting. Review the edited edges closely, especially around straps, fringe, lace, fur trim, sheer fabric, and loose threads. These areas can look unnatural if the cutout is inaccurate.
Use a Photo Order That Answers Buyer Questions
Your cover image should be the clearest, most attractive full view of the item. After that, use the remaining photos to document the garment thoroughly. Think about the questions you would ask if you were unable to hold the item yourself.
- Cover photo: A centered, well-lit front view that clearly shows the item.
- Back view: Important for dresses, jackets, jeans, and pieces with back details.
- Side or angled view: Helpful for showing structure, volume, and shape.
- Fabric close-up: Show weave, texture, print, embellishment, or material detail.
- Brand and size tag: Include legible photos of both whenever available.
- Measurement photo: Photograph a tape measure across the relevant area.
- Condition photo: Clearly show stains, snags, wear, fading, or repairs.
For example, imagine listing a pre-owned black linen blazer. Your cover photo could show the blazer on a hanger against a light neutral background. The next images could show the back, lapel, button detail, linen texture, size tag, pit-to-pit measurement, sleeve length, and a close-up of a small mark near the cuff. This sequence is more useful than uploading six similar front-facing images.
Frame Clothing Photos for Search and Scrolling
Leave enough space around the garment that it does not feel cramped, but do not make it so small that buyers must zoom in to identify it. Keep the camera level and shoot straight on whenever possible. A tilted image can make hems and seams look uneven even when the garment is not.
For a cover image, fill most of the frame with the item while preserving its full outline. Do not crop off sleeves, hems, straps, or footwear unless the crop is intentional and another image shows the complete item. Save close crops for details such as fabric texture, hardware, labels, or flaws.
Edit for Clarity, Not for a Different Product
Editing can improve the consistency of your Poshmark product photos, especially when you are photographing inventory over several days. Basic improvements may include straightening, cropping, modest brightness adjustments, shadow balancing, background cleanup, and light wrinkle reduction.
Use restraint. Excessive smoothing can erase the natural texture of linen, denim, knits, leather, or distressed fabric. Heavy color correction can make a navy piece appear black or a cream piece appear bright white. Always compare the edited image with the original garment under neutral light before publishing.
- Do correct an uneven crop or a distracting background.
- Do improve lighting enough to show the garment clearly.
- Do disclose visible condition issues in photos and description.
- Do not remove stains, holes, pulls, or signs of wear.
- Do not alter logos, labels, prints, sizing, or garment proportions.
Build a Faster Batch-Photography Routine
Photographing one item from start to finish can feel slow because you repeatedly reset lights, backgrounds, and camera position. Batch work is usually more efficient. Prepare several items, photograph all front views, then capture back views, tags, measurements, and detail shots in the same order.
Use a small checklist so important photos are not missed:
- Garment steamed, lint-rolled, and checked for flaws.
- Front, back, and detail images captured.
- Tag and measurements photographed.
- Condition issues documented clearly.
- Cover photo selected and edited consistently.
Rename or group your photos by item before listing. This prevents tag photos, measurements, and close-ups from being attached to the wrong garment during a busy listing session.
Make Every Image Support an Honest Listing
The most effective Poshmark photos balance polish with transparency. A clean background and flattering light help a listing look professional, while close-ups of tags, measurements, fabric, and flaws provide the evidence buyers need. This combination can make your closet easier to shop and your listings easier to understand.
If you want to refine garment presentation after photographing an item, Clothing Studio's guide to ghost mannequin photos explains when that format can be useful for apparel listings. Review any edited result against the original garment, and remember that access to full app features requires a subscription.
Start with one repeatable setup, use a complete photo sequence, and prioritize accuracy. Over time, that consistent process can help you make product photos for Poshmark that look cleaner, answer more questions, and give shoppers a better view of what they are buying.
