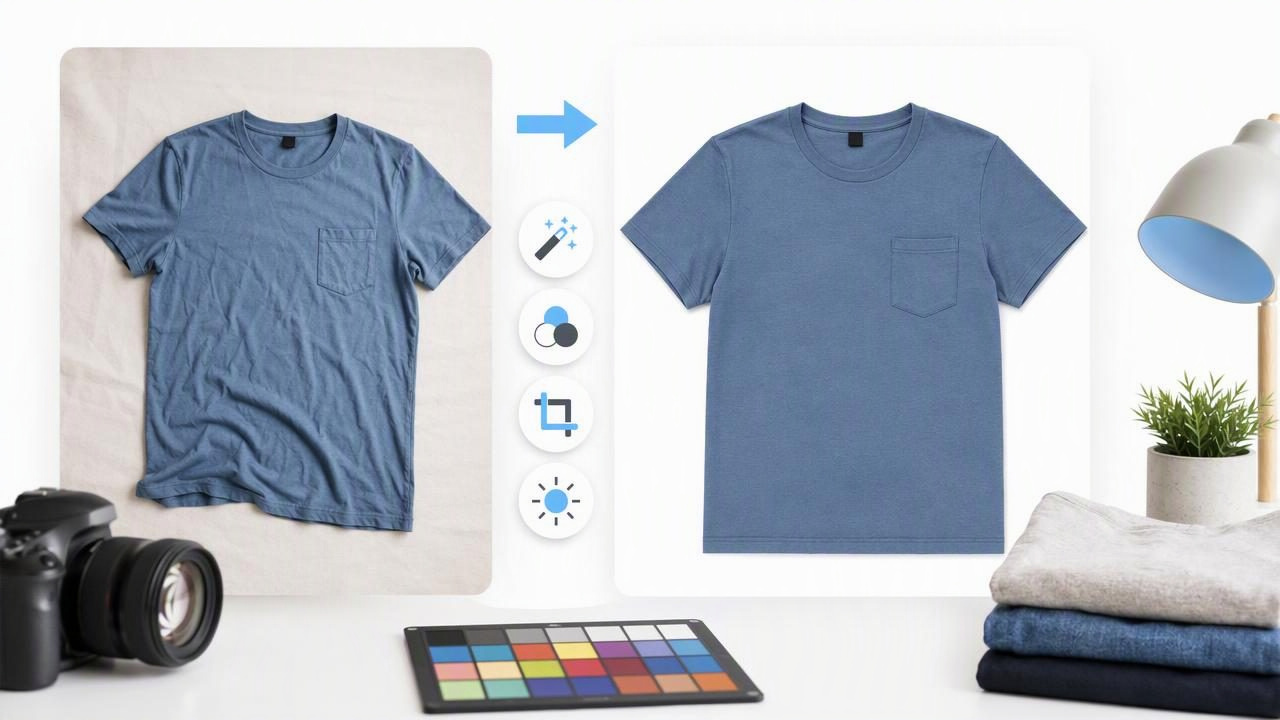
Learning how to edit clothing photos for eBay can make a major difference in how clearly shoppers understand an item before they buy. A strong listing photo does not need dramatic effects or a studio-sized budget. It needs to show the garment honestly, make important details easy to inspect, and keep the presentation consistent across your inventory.
For fashion resellers, the goal is simple: help a buyer answer practical questions quickly. What is the item? What color is it? What shape does it have? Is the fabric smooth, textured, fitted, oversized, lightweight, or structured? Are there visible flaws? Thoughtful editing can remove distractions around the garment while preserving the features a buyer needs to evaluate.
This guide explains how to prepare, edit, and check apparel images for eBay listings without creating a misleading result. It also includes a concrete example for editing a common secondhand clothing item: a wrinkled blouse photographed on a hanger.
Start With a Photo That Shows the Garment Clearly
Editing is most effective when the original image is already reasonably clear. Before opening an editor, photograph the clothing in bright, even light. Daylight near a window can work well when it is indirect, while two soft lights can reduce harsh shadows indoors. Avoid mixed lighting, such as warm overhead bulbs combined with blue daylight, because it can make white, cream, gray, and pastel garments look inaccurate.
Use a plain backdrop when possible. A clean wall, foam board, seamless paper, or neutral surface helps the garment remain the focus. Keep the camera level and leave some room around the item, especially around sleeves, hems, collars, and straps. Cropping too tightly during capture can make it difficult to create a balanced final image.
- Photograph the front, back, brand label, size tag, fabric tag, and any notable details.
- Take close-ups of embroidery, buttons, hardware, knit texture, prints, and seams.
- Photograph flaws separately, including stains, pilling, snags, fading, or missing components.
- Use the same general lighting and layout for similar inventory categories.
Good editing improves a useful source image. It cannot reliably reveal hidden details, restore missing fabric, or prove an exact fit.
Choose the Best Clothing Presentation for the Item
There is no single best layout for every eBay clothing listing. The right presentation depends on the garment type and which features deserve attention. A blazer may benefit from a structured ghost mannequin image, while a graphic T-shirt can look excellent in a flat lay. A lightweight blouse may be easiest to photograph on a hanger, especially if sleeve shape and drape matter.
| Presentation style | Best for | What it helps show |
|---|---|---|
| Flat lay | T-shirts, denim, sweaters, activewear | Overall shape, print placement, measurements, fabric texture |
| On hanger | Blouses, dresses, coats, jackets | Drape, neckline, sleeve length, shoulder structure |
| Folded | Knitwear, basics, bundles | Fabric weight, logo placement, folded retail-style presentation |
| Ghost mannequin | Structured tops, dresses, outerwear | Garment form without a visible person or mannequin |
Whatever layout you choose, use additional photos to fill in what the main image cannot show. For example, a ghost mannequin photo can communicate shape, but a close-up of the care label and a flat image of the hem can provide useful supporting information.
A Concrete Example: Editing a Wrinkled Blouse for eBay
Imagine you are listing a navy blue polyester blouse with a collar, button front, and slightly puffed sleeves. You photographed it on a hanger against a beige wall. The photo is well lit, but the wall has a visible corner, the blouse has shipping wrinkles, and the navy color looks slightly washed out.
Your objective is not to make the blouse look brand new. Your objective is to make the garment easier to inspect while keeping its real condition apparent.
- Crop with breathing room. Straighten the image so the hanger and button placket are vertical. Crop out excess ceiling, floor, and empty wall, but do not trim the sleeve cuffs or hem.
- Remove the distracting background. Replace the beige wall and visible corner with a simple, clean background. Check the outline around the puffed sleeves, collar points, and hanger hook. If an edge looks clipped or fuzzy, correct it before using the image.
- Adjust brightness and white balance gently. Increase exposure only enough to reveal the navy fabric and button details. If the blouse appears grayish, carefully correct the color, comparing it to the physical garment under neutral light.
- Reduce minor presentation wrinkles selectively. Light wrinkles caused by storage can distract from the blouse shape. Reducing those creases can create a neater image, but leave natural drape, seam shaping, and fabric texture intact. Do not smooth an area that contains pilling, damage, puckering, or a possible stain.
- Keep the listing honest with detail photos. If there is a small pull near the cuff, include a separate close-up. Do not rely on retouching to hide it, even if it is subtle in the main image.
The finished first image should show a clean navy blouse with clear edges, visible buttons, and a believable fabric surface. The supporting images should verify the label, measurements, back view, cuff detail, and any condition issue.
Make Edits That Help Buyers Inspect the Clothing
The most useful edits for apparel listings are usually modest. They improve visibility and consistency without changing the item itself. Focus on the adjustments that remove visual noise rather than adding artificial polish.
Background cleanup
A plain background helps buyers focus on the garment and makes your listing grid look more consistent. After background removal, zoom in around thin straps, lace, fringes, sheer fabric, fur trim, and ruffled edges. These areas can be more difficult to separate cleanly. If the result loses important garment edges, use the original image or try a simpler background setup for a new photo.
Color and exposure correction
Adjust lighting so dark garments still show their seams and lighter garments do not lose detail. Avoid extreme saturation, contrast, or sharpening. Over-editing can make black clothing look blue, cream clothing look bright white, and delicate fabrics look unnaturally crisp.
Wrinkle retouching
Small storage wrinkles may be reduced when they distract from the presentation, particularly on a clean, flat fabric area. However, wrinkles can also communicate the material’s natural behavior. Linen, rayon, silk blends, and soft jersey will not look as smooth as heavy polyester or structured cotton. A realistic result should still resemble the original garment.
Shape and alignment
Straightening a tilted image, centering a hanger, and aligning a flat lay can make a listing feel more organized. Avoid reshaping the garment to look smaller, longer, more fitted, or more symmetrical than it really is. Product photos should represent the actual item rather than simulate an exact on-body fit.
Common Editing Mistakes to Avoid
- Using one image for everything: A polished main photo cannot replace label, measurement, fabric, and flaw images.
- Removing all shadows: Light natural shadows can help a garment retain depth. Completely flat images can make clothing look cut out or unrealistic.
- Hiding condition issues: Editing out a stain, tear, discoloration, or wear mark creates an inaccurate listing presentation.
- Over-smoothing fabric: Heavy wrinkle reduction can erase texture, seams, ribbing, and signs of fabric condition.
- Inconsistent colors across images: If the front image is deep navy and the back image appears bright blue, buyers may question which color is accurate.
- Ignoring edges after background removal: Missing straps, jagged cuffs, and clipped hems can make an otherwise good listing image look careless.
Use This Final Quality Check Before Publishing
Review each edited image on a phone screen as well as a larger display. Many eBay buyers will first see the listing on mobile, where small details need to remain clear. Compare the final version against your original photo and the physical garment.
- Does the color look close to the garment in neutral lighting?
- Are the collar, sleeves, hem, and straps fully visible?
- Did background cleanup preserve fine edges and details?
- Are the main photo and supporting photos visually consistent?
- Are visible flaws clearly documented rather than concealed?
- Does the edited result still look like the actual item you are selling?
If the answer to the final question is no, reduce the editing. Clear, trustworthy photos are more valuable than images that look overly perfected.
Remember the Limits of Clothing Photo Editing
Photo editing can improve presentation, but it cannot confirm how a garment fits on every body type, reconstruct hidden areas, or repair real damage. A ghost mannequin image can show general shape, yet it is not a guarantee of exact fit or fabric movement. Likewise, wrinkle retouching can reduce distracting creases, but it should not erase the garment’s real texture, wear, or condition.
Use measurements, condition notes, close-up photos, and accurate item specifics alongside edited images. Together, these details give eBay shoppers a more complete understanding of what they are considering.
For resellers who want help refining garment presentation, Clothing Studio’s guide to removing clothing wrinkles from photos offers practical context on creating a cleaner look while keeping the original garment’s details in view.
