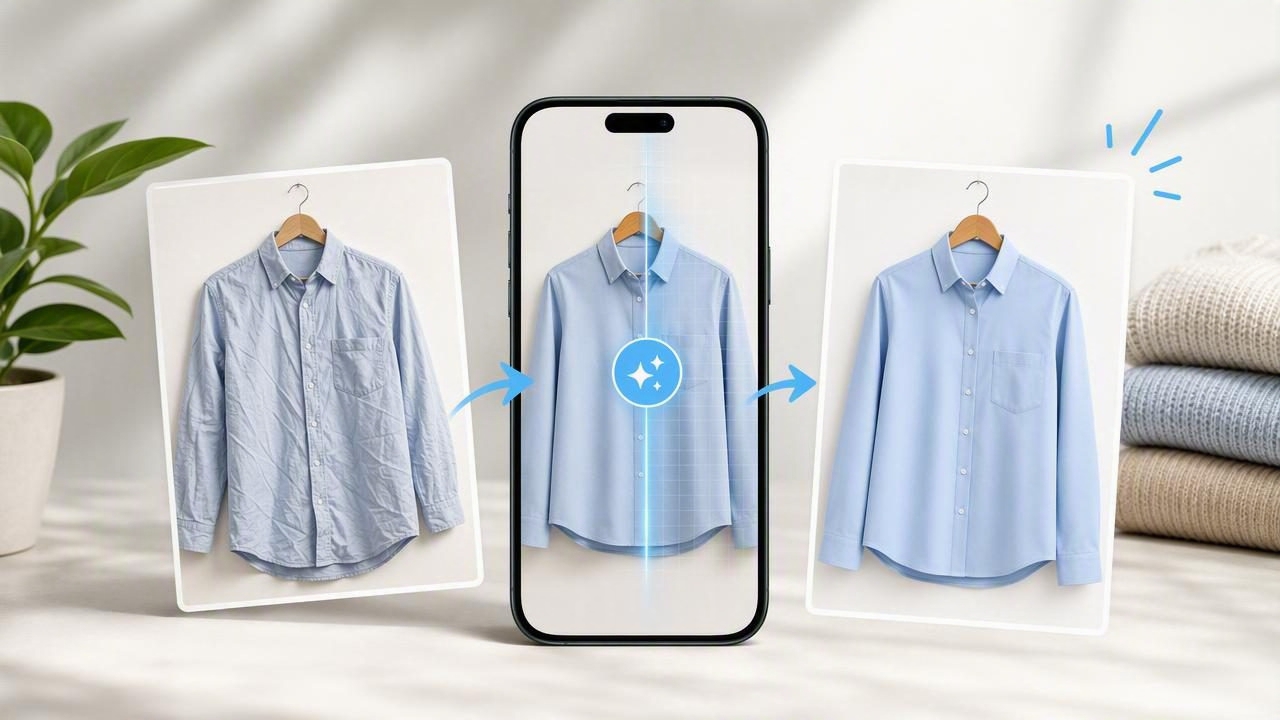
In fashion resale and e-commerce, presentation matters before a shopper reads a single word of your listing. A buyer scrolling through dozens of similar dresses, shirts, or jackets will often pause first for the item that looks clean, well-shaped, and ready to wear. Unfortunately, secondhand clothing is rarely photo-ready straight from a storage bin, mailer, or thrift haul.
Deep folds, hanger creases, shipping wrinkles, and fabric bunching can make an otherwise excellent item appear less valuable. While steaming and ironing remain useful for preparing garments, they can add significant time to a reseller's workflow. An unwrinkle clothes app can help sellers refine the appearance of clothing photos after the shoot, creating a smoother and more polished presentation without needing to retake every image.
This guide explains how digital wrinkle removal works in a practical clothing listing workflow, when to use it, what to avoid, and how it can support better e-commerce photography.
Why Wrinkles Matter in Clothing Listing Photos
Wrinkles are normal, especially on pre-owned clothing. However, in an online photo, they can create an unintended impression. Shoppers cannot touch the fabric, assess its drape in person, or see how the garment looks after a quick steam. Your images need to communicate as much information as possible at a glance.
Heavy wrinkles can make a listing photo look:
- Less professional or less carefully prepared
- More worn than the garment actually is
- Harder to evaluate for fit, shape, and construction
- Less appealing in search results and category feeds
- Inconsistent beside smoother-looking competitor listings
That does not mean every crease should disappear. Natural texture is important, particularly for linen, cotton gauze, seersucker, rib knits, pleated garments, and intentionally crinkled designs. The goal is not to make fabric look artificial. The goal is to reduce distracting wrinkles that hide the garment's actual shape.
What an Unwrinkle Clothes App Does
An unwrinkle clothes app uses AI photo editing to identify distracting folds and smooth selected areas of a clothing image. Instead of manually editing every crease with complex desktop software, sellers can quickly improve a photo from a phone.
The best results preserve key garment details while reducing visual clutter. This means seams, buttons, collars, pockets, prints, ribbing, and hems should remain recognizable. A good edit should make the item look freshly prepared, not digitally altered beyond recognition.
For resellers, wrinkle reduction is especially useful when working with high inventory volume. A batch of 20, 50, or 100 garments can be photographed efficiently, then polished as part of a repeatable listing process.
Wrinkle Removal Is Not the Same as Retouching the Garment
There is an important difference between improving presentation and misrepresenting an item. Smoothing shipping wrinkles or minor fabric bunching is generally about showing the garment more clearly. Removing stains, holes, pilling, fading, pulled threads, or damage is different and can mislead buyers.
Simple rule: Edit temporary presentation issues, but disclose permanent condition issues.
If a blouse has a small stain, photograph it clearly and mention it in the description. If a jacket arrived folded and has temporary fold lines, a light wrinkle edit can help shoppers focus on the jacket's true design.
Where Wrinkle Reduction Has the Biggest Impact
Not every listing photo needs the same amount of editing. Focus your effort on the images most likely to influence a buyer's first impression.
| Photo Type | Why It Matters | Recommended Editing Approach |
|---|---|---|
| Cover photo | This is often the first image a shopper sees in search. | Use the cleanest photo, smooth major wrinkles, and keep the garment shape clear. |
| Front view | Shows silhouette, neckline, length, and overall condition. | Reduce distracting fold lines while preserving seams and natural drape. |
| Back view | Helps buyers evaluate fit and design details. | Apply light smoothing, especially around broad flat panels. |
| Detail photos | Show labels, fabric texture, buttons, and flaws. | Use minimal smoothing; texture and condition should stay accurate. |
| Flat lay or folded image | Useful for knitwear, activewear, and casual pieces. | Smooth uneven bunching but retain intentional folds and fabric character. |
A Simple Workflow for Cleaner Clothing Photos
The most effective editing workflow starts before you open an app. Better source images create better results and reduce the amount of digital correction you need.
- Inspect the garment. Check for stains, missing buttons, pulls, holes, and signs of wear. Set aside any flaws you need to photograph separately.
- Prepare the item physically. Shake it out, button or zip it as appropriate, straighten collars, and use a steamer when practical. A few seconds of preparation can prevent extensive editing later.
- Choose a consistent presentation. Photograph items on a hanger, flat surface, mannequin, or model according to your store's visual style.
- Use even lighting. Bright, soft light makes wrinkles easier to assess and helps prevent harsh shadows from being mistaken for fabric creases.
- Capture multiple angles. Take front, back, label, fabric, and detail photos before editing. This protects you if you need to show a specific feature or condition note.
- Apply wrinkle reduction selectively. Start with a light edit. Review buttons, seams, prints, and edges before saving.
- Finish your listing images. Crop consistently, use background removal where appropriate, and verify that colors remain true to the item.
For high-volume sellers, it helps to use the same order every time: photograph, select the strongest images, unwrinkle, remove or clean the background, crop, then upload. Repeating this sequence makes it easier to maintain a recognizable storefront style.
How to Keep AI Edits Natural
AI photo editing can save time, but restraint is essential. Over-editing can flatten fabric, erase construction details, or make a garment appear unnaturally smooth. Buyers may notice when a photo looks inconsistent with the material shown in close-up images.
Use these guidelines to maintain a realistic result:
- Start small. A subtle adjustment often looks more believable than maximum smoothing.
- Protect garment structure. Keep darts, pleats, gathers, cuffs, lapels, and waist seams visible.
- Review patterned fabrics closely. Stripes, florals, logos, embroidery, and plaid can look distorted if edited too aggressively.
- Preserve material texture. Denim, linen, cable knit, velvet, and ribbed fabric should still look like their actual materials.
- Compare before and after. If the result changes the cut, color, or condition of the clothing, reduce the edit or use the original photo.
A useful test is to ask: Would a buyer recognize this garment immediately when it arrives? If the answer is yes, the photo is likely presenting the item fairly.
Pairing Wrinkle Reduction With Better E-Commerce Photography
Wrinkle removal works best as one part of a broader clothing presentation strategy. It cannot compensate for a dark, blurry, poorly framed image, but it can make a solid image look more polished.
Consider combining it with these practical improvements:
- Background removal: A clean, uncluttered background keeps attention on the garment and can create consistency across your catalog.
- Ghost mannequin presentation: This style can show the structure and fit of an item without showing a person, especially for tops, dresses, and jackets.
- Accurate color correction: Adjust lighting carefully so colors look closer to the real garment, not brighter or more saturated than reality.
- Consistent aspect ratios: Similar crops create a more organized shop page and help buyers compare pieces quickly.
- Clear condition photos: Keep close-up images of flaws honest and unedited so shoppers can make informed decisions.
When these elements work together, listings feel more trustworthy and easier to browse. The objective is not perfection for its own sake. It is clarity: helping a customer understand what they are buying.
When You Should Still Steam or Iron First
A digital wrinkle remover is helpful, but it is not a replacement for basic garment care in every situation. Some items need physical preparation before photography, particularly when wrinkles affect the silhouette.
Steam or iron first when:
- A collar, lapel, cuff, or hem is folded out of shape
- A dress or skirt has deep creases that change how it hangs
- The garment has broad panels with strong shipping fold lines
- You are photographing luxury, formal, or higher-priced apparel
- The material is shiny and highlights every crease under lighting
Think of physical preparation as the foundation and app-based editing as the finishing touch. A quick steam may take less time than trying to correct severe wrinkles digitally, especially when the item needs to look its best from several angles.
Common Mistakes to Avoid
Even a fast editing tool can create problems when used without a consistent process. Avoid these common mistakes:
- Editing away flaws: Do not use smoothing to hide wear, staining, or damage.
- Making fabric look plastic: Excessive smoothing can remove the texture that makes clothing look real.
- Ignoring shadows: Some dark areas are lighting shadows, not wrinkles. Correct the lighting or exposure before smoothing them.
- Using one setting for every fabric: Linen and silk need a different approach than a heavyweight sweatshirt or denim jacket.
- Forgetting the original file: Keep unedited photos in case you need to reference condition, retouch again, or answer buyer questions.
Final Thoughts
An unwrinkle clothes app can be a practical time-saver for sellers who want cleaner apparel photos without turning every listing into a lengthy editing project. Used thoughtfully, it helps reduce temporary creases, improve visual consistency, and keep the focus on a garment's shape and design.
For the strongest results, begin with well-lit photos and basic physical preparation, then use AI editing lightly to refine what the camera captures. Platforms such as Clothing Studio can fit into this kind of streamlined workflow by helping sellers improve clothing presentation alongside background cleanup and other listing-photo tasks.