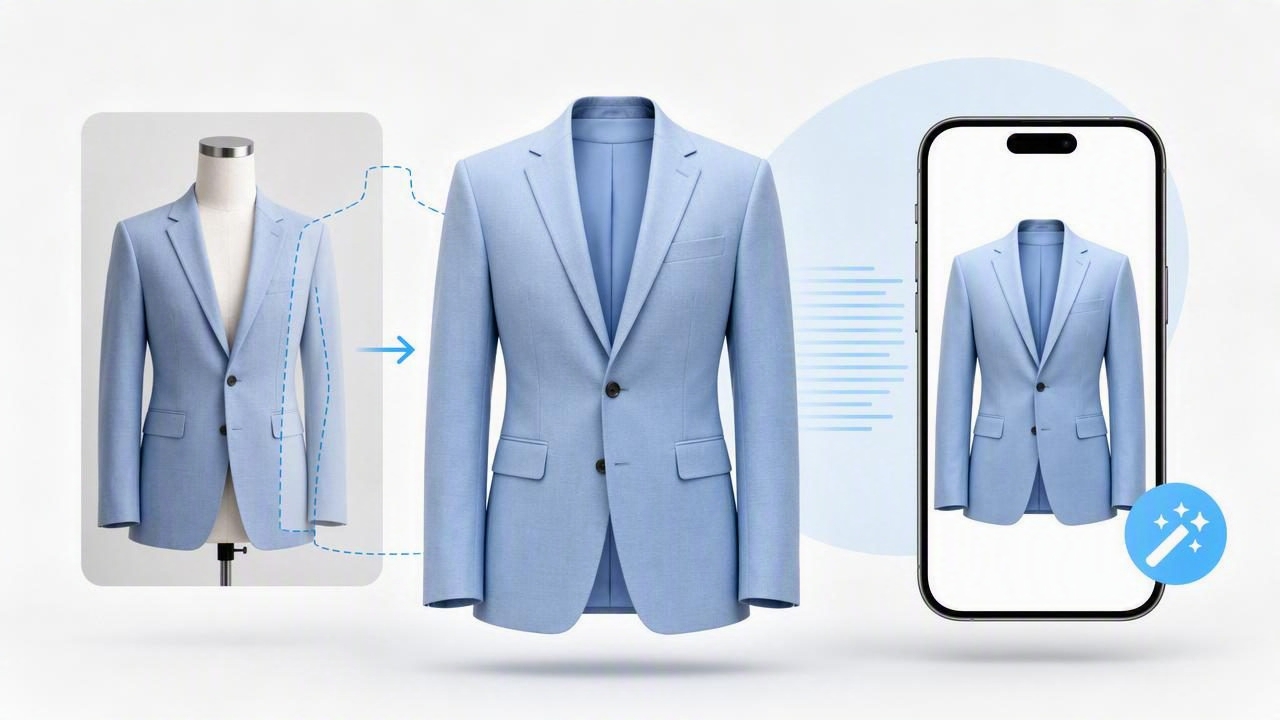
For fashion resellers, boutiques, and online apparel brands, product images do much more than fill space in a listing. They help shoppers understand fit, shape, fabric, and condition before they click “buy.” A ghost mannequin app makes this process faster by turning a photographed garment into a clean, body-shaped product image without showing the mannequin, model, or hanger.
The result is a polished presentation often called the invisible mannequin effect. Instead of a flat garment with unclear proportions, buyers see a shirt, dress, jacket, or pair of trousers with visible structure. Sleeves look filled out, shoulders hold their shape, and the inside neckline or back panel can be blended in naturally.
For sellers managing dozens of listings each week, this approach can save significant editing time while creating a more consistent storefront. Here is how ghost mannequin photography works, when to use it, and how to get better results from a mobile editing workflow.
What Is a Ghost Mannequin Effect?
A ghost mannequin effect is an e-commerce photography technique that removes the mannequin or model from a clothing image while preserving the garment’s natural three-dimensional form. The finished image makes it appear as though an invisible person is wearing the item.
Traditionally, creating this look required multiple photographs, desktop editing software, careful clipping paths, and manual compositing. For example, a seller might photograph the front of a jacket on a mannequin, then separately photograph the inner neck label and back collar. An editor would combine those images to create a seamless, hollow interior.
Today, AI photo editing tools can simplify much of that process. A ghost mannequin app may automatically identify the garment, remove the original background, hide the mannequin, rebuild missing areas, and produce a cleaner apparel image. While results still depend on the starting photo, the workflow is far more accessible for small sellers and growing fashion businesses.
Why Ghost Mannequin Images Help Clothing Listings
Online shoppers cannot touch fabric, try on an item, or inspect its construction in person. Strong images reduce that uncertainty. A ghost mannequin image gives shoppers more visual context than a folded photo while keeping the focus entirely on the product.
- Shows shape clearly: Buyers can better judge the silhouette, sleeve length, shoulder structure, and overall cut.
- Creates a professional catalog look: Consistent product presentation makes a resale closet or brand store feel more organized and trustworthy.
- Reduces visual distractions: No visible mannequin, cluttered room, hands, or hanger competes with the garment.
- Supports faster comparison: When every item uses a similar format, shoppers can scan colors, styles, and fits more easily.
- Works across categories: The approach is useful for shirts, blazers, dresses, sweaters, denim, skirts, outerwear, and children’s clothing.
Ghost mannequin photos are especially helpful for structured garments. A blazer, collared shirt, puffer vest, or fitted dress often looks more appealing when its intended shape is visible. Flat-lay photography still has value, but it may not communicate the same fit and volume.
Ghost Mannequin App vs. Traditional Editing
| Workflow | Best For | Time Commitment | Typical Challenge |
|---|---|---|---|
| Manual desktop compositing | High-end campaigns and complex garments | High | Requires editing skill and multiple source photos |
| Professional studio retouching | Large catalogs with dedicated budgets | Moderate to high | Added outsourcing cost and turnaround time |
| Ghost mannequin app | Resellers and teams needing fast listing images | Low to moderate | Needs a clean, well-lit starting photo |
An app does not eliminate the need for good product photography. Rather, it helps turn a solid source image into a listing-ready visual more efficiently. The cleaner the garment edges, lighting, and pose, the more natural the final result will look.
How to Create Better Ghost Mannequin Photos
1. Prepare the garment first
Editing cannot fully fix a garment that is bunched, inside out, or poorly positioned. Button buttons, zip zippers, straighten collars, smooth hems, and arrange sleeves evenly before taking the photo. Remove lint, pet hair, stickers, and loose threads when possible.
If an item has wrinkles, lightly steam it before shooting. For secondhand clothing, this small step can make a major difference in perceived condition. Do not over-smooth the item, though. Buyers should still see genuine texture, knit patterns, pleats, and fabric drape.
2. Use a simple shooting setup
Place the garment on a mannequin that closely matches its size. An oversized garment on a very small form may look stretched in odd places, while a fitted garment on an oversized mannequin can distort the shape. Neutral-colored mannequins are usually easier to edit because they provide clear contrast against most clothing.
Use even light from a window, softbox, or ring light. Avoid harsh directional shadows, as these can make background removal and edge cleanup more difficult. Photograph against a plain wall or backdrop whenever possible.
3. Capture the right angles
Start with a centered front view. Keep the camera level with the middle of the garment and avoid shooting from too high or too low. A tilted image can make hems and shoulder lines appear uneven.
For products with interior details, take an additional photo of the inside neck, waistband, hood, or back panel. This can be useful when creating a more complete invisible mannequin effect. Also capture close-ups of labels, texture, buttons, embroidery, flaws, and care tags for the rest of your listing gallery.
4. Apply the ghost mannequin effect
Upload the strongest front-facing image to your chosen editor. Select the ghost mannequin or clothing presentation option, then review the output before saving. Look closely around collars, armholes, cuffs, waistbands, and hems, since these areas often reveal whether an edit looks natural.
If available, choose a clean background that aligns with the marketplace where you sell. White is common for e-commerce photography because it keeps attention on the item and creates consistency across listings. However, always check the current image rules for the platform you use.
5. Export with listing consistency in mind
Use the same image ratio, background style, and approximate garment scale across your catalog. A consistent first photo makes a shop look intentional even when it includes a mix of brands, sizes, and categories. Save a high-quality version before compressing or cropping for a marketplace.
Best Practices for More Natural Results
A convincing ghost mannequin image should look clean, but not artificial. Keep these practical details in mind:
- Leave room around the item. Do not crop tightly against sleeves, hems, or shoulders. Editing tools need visible edges to separate the garment from its surroundings.
- Use contrast. A black sweater against a dark wall or a white dress against a bright background may be harder to isolate accurately.
- Keep both sleeves visible. When one sleeve is hidden, folded behind the garment, or heavily shadowed, the final silhouette can look unbalanced.
- Preserve garment details. Check that buttons, logos, lace, mesh, belts, and seams remain accurate after editing.
- Do not misrepresent fit. A ghost mannequin image should show the garment’s design, not make it look smaller, longer, smoother, or more fitted than it truly is.
Think of ghost mannequin editing as presentation, not alteration. The goal is to clarify the product for the buyer while keeping the item honest.
When to Use Ghost Mannequin Photos
Ghost mannequin presentation is ideal when shape is a major selling point. Use it for tailored blazers, structured dresses, sweaters, coats, button-down shirts, jumpsuits, and activewear. It can also be useful for premium or higher-priced items where shoppers expect a more refined product gallery.
It may be less useful for highly oversized pieces, delicate vintage garments, very sheer fabrics, or items whose appeal depends on movement. In those cases, consider combining a ghost mannequin main image with a flat lay, close-up detail shots, and measurements.
A balanced listing often includes:
- One clean ghost mannequin or front presentation image
- One back view
- Close-ups of fabric, tags, hardware, and key details
- Clear images of any wear, stains, repairs, or flaws
- A measurement photo when fit is especially important
Quality Check Before You Publish
Before uploading, review every image at full size and as a small thumbnail. The thumbnail test matters because many buyers first see your product image in search results. Ask whether the garment is immediately recognizable and whether the silhouette looks believable.
- Are the shoulders level and sleeves symmetrical?
- Are the collar, neckline, or hood edges complete?
- Does the background look clean without cutting into the garment?
- Are colors close to the real item under natural light?
- Have you included photos that disclose condition accurately?
Finally, make sure your title and description support what the image shows. Mention the garment type, brand, size, color, material, and notable features. Strong e-commerce photography attracts attention, while clear listing details help buyers make confident decisions.
Make Product Presentation Easier to Repeat
The biggest benefit of using a ghost mannequin app is not just one polished photo. It is building a repeatable workflow that helps every new listing look clearer and more consistent. Start with good lighting and garment preparation, take a centered photo, review the edited result, and pair it with honest detail images.
For sellers who want a mobile-first option for clothing presentation, Clothing Studio can help streamline ghost mannequin images alongside background removal and other apparel-focused edits. Whatever tool you choose, prioritize accuracy, consistency, and photos that make the garment easy to understand at a glance.