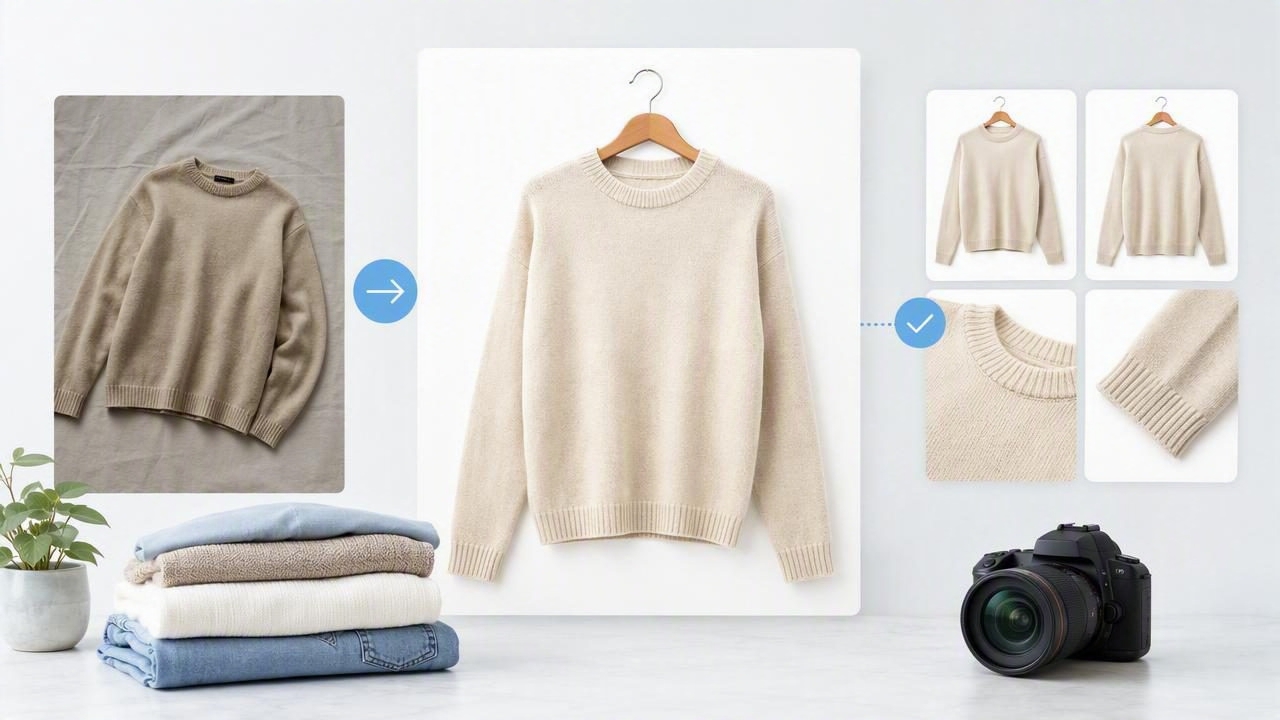
A reliable ecommerce photo editor can help fashion resellers, boutique owners, and apparel brands create cleaner product listings without turning every item into a complicated photo shoot. For clothing, the goal is not to make a garment look like something it is not. The goal is to present its color, shape, condition, and important details clearly enough that shoppers can make confident buying decisions.
Strong clothing photos create a more professional storefront across marketplaces and brand websites. They also make it easier for shoppers to compare items, understand the garment’s silhouette, and notice useful details such as neckline shape, sleeve length, fabric texture, buttons, pockets, and hems.
This guide explains a practical ecommerce photo editing workflow for apparel, including background removal, wrinkle retouching, crop consistency, ghost mannequin images, and quality checks. It also covers where editing should stop so your photos remain accurate and trustworthy.
What an Ecommerce Photo Editor Should Do for Clothing
Clothing is harder to photograph than many products because it is soft, flexible, reflective in places, and easily affected by lighting. A shirt can look uneven because of a hanger, a blazer can develop distracting creases during storage, and a pale garment can blend into a light background.
An ecommerce photo editor should help solve presentation issues that distract from the item itself. For apparel listings, the most useful edits usually include:
- Background cleanup to remove distracting rooms, rails, floors, or props.
- Crop and canvas adjustments to keep listing thumbnails visually consistent.
- Light wrinkle reduction to improve presentation while retaining realistic fabric character.
- Ghost mannequin composition to show a garment’s shape without displaying a mannequin.
- Basic brightness and color review so the photo is easy to inspect.
Editing works best when it supports a clear original photo. It cannot reliably replace good lighting, correct garment preparation, or detail images of labels and flaws.
Start With a Photo Worth Editing
The best editing results begin before you open an app. Lay the garment flat, place it on a hanger, or photograph it on a mannequin depending on the listing style you need. Smooth the item by hand before shooting, button or zip it correctly, align the shoulders, and check that sleeves and hems are visible.
Use even light whenever possible. Window light can work well when it is bright but indirect. Avoid harsh overhead lighting that creates deep shadows in seams and under sleeves. Before taking the photo, look for common distractions: a visible chair, an uneven bedspread, a clothing rack, a hand at the edge of the frame, or a hanger hook that cuts into the collar.
Capture more than one image. Your main image may be an edited hero shot, but a complete listing should also include close-ups of fabric, care labels, brand tags, measurements, hardware, and any visible wear. An ecommerce photo editor can refine the hero image, while supporting photos provide the evidence shoppers need.
A Practical Editing Order for Apparel Photos
The order of your edits matters. If you crop too tightly before removing the background, for example, you may accidentally cut off part of a sleeve or hem. A consistent sequence reduces rework and helps every listing follow the same visual standard.
- Choose the strongest original image. Select the sharpest photo with the most accurate color and a complete view of the garment.
- Review garment positioning. Confirm that the item is centered, straight, and fully visible. If it is twisted or partly hidden, use a better source photo rather than trying to force an edit.
- Remove or simplify the background. A clean plain background helps shoppers focus on the clothing. Check edges around straps, cuffs, lace, fringes, and collars carefully.
- Reduce distracting wrinkles selectively. Focus on temporary packing creases or folds that obscure the garment. Do not remove every natural fold, especially on linen, jersey, rib knit, velvet, or draped styles.
- Set a consistent crop. Leave enough space around the item so it does not feel cramped in marketplace thumbnails.
- Compare the edit with the original. This final check helps you catch altered colors, missing edges, or details that no longer look true to the garment.
Concrete Example: Editing a Navy Linen Blazer
Imagine you are listing a navy linen blazer. You photographed it on a mannequin near a window, but the original image includes a beige wall, a small shadow beneath one sleeve, and several horizontal storage creases across the front panels.
First, choose the image where the lapels sit evenly and both sleeves are fully visible. Remove the beige wall so the blazer becomes the visual focus. Next, inspect the edge around the collar, lapels, buttons, and sleeve cuffs. These areas often need the closest review because fine edges can look unnatural if they are cut away or softened too aggressively.
Then reduce only the most distracting storage creases across the chest. Linen naturally has texture and some wrinkling, so making it appear perfectly pressed could misrepresent the fabric. Keep enough natural texture that a shopper still understands it is linen. Finally, crop the blazer consistently with your other outerwear photos and compare the final image side by side with the original.
The finished image should look cleaner, not newly manufactured. The navy color, lapel shape, button placement, texture, and any visible wear should remain consistent with the actual item.
Choose the Right Clothing Presentation Style
There is no single best image style for every garment. The right choice depends on the item, your available setup, and what shoppers need to see first.
| Presentation style | Best for | Watch for |
|---|---|---|
| Flat lay | Tees, knitwear, folded items, accessories | Uneven shoulders, hidden side seams, cluttered surfaces |
| On hanger | Blouses, dresses, lightweight tops | Stretched necklines, crooked hanger hooks, distorted shoulders |
| Ghost mannequin | Structured tops, jackets, dresses, activewear | Missing interior areas, mismatched collar edges, unrealistic shape |
| Folded presentation | Sweaters, denim, packaged clothing | Important design features hidden by the fold |
For a structured garment, ghost mannequin imagery can be useful because it shows volume and fit direction without requiring a live model. However, it is a presentation method, not a guarantee of exact fit. A ghost mannequin photo cannot show how a garment will fit every body shape or repair hidden damage inside the item.
Keep Your Listing Images Consistent
Consistency makes a resale closet or ecommerce catalog easier to browse. When every main image has a similar background, crop, lighting level, and garment scale, shoppers can scan listings faster. This is especially valuable when you sell many similar categories, such as dresses, denim, blazers, or children’s clothing.
Create a simple visual standard for your shop. For example, use a light neutral background, center each garment vertically, leave a small margin around the edges, and use the same main-image style within each category. Avoid changing the background color or crop dramatically from one listing to the next unless there is a clear reason.
Useful rule: Edit for clarity and consistency, then use close-up photos and written descriptions for condition, measurements, fabric content, and flaws.
What Photo Editing Cannot Fix
An ecommerce photo editor is helpful, but it has limits. It should not be used to hide stains, holes, pilling, discoloration, missing buttons, stretched elastic, or other condition issues that buyers need to know about. Those details should be photographed and disclosed clearly.
Likewise, avoid relying on editing to change garment color, alter the cut, add missing fabric, or create a precise fit simulation. Editing may affect fine texture, edges, or small details, particularly around sheer materials, embroidery, sequins, lace, fur-like trims, and layered collars. Always inspect the output at full size before publishing.
If the original is heavily blurred, poorly lit, or blocked by another object, retaking the image is usually the better choice. A fast re-shoot often produces a more honest and usable result than extensive correction.
Final Quality Check Before Publishing
- Does the edited photo match the garment’s real color?
- Are the neckline, sleeves, hem, and edges complete?
- Is the garment centered and easy to understand in a thumbnail?
- Have natural fabric texture and meaningful details been retained?
- Do supporting photos show labels, measurements, and any flaws?
- Does the main photo match the presentation style of your other listings?
For sellers using an iPhone workflow, Clothing Studio’s ghost mannequin photo guide offers additional context on preparing garment images for this presentation style. Whatever tool you use, review every edited result against the original garment before it goes live.
A thoughtful ecommerce photo editor workflow does more than make listings look polished. It helps shoppers see the product clearly, supports accurate expectations, and gives your clothing catalog a consistent visual foundation.
