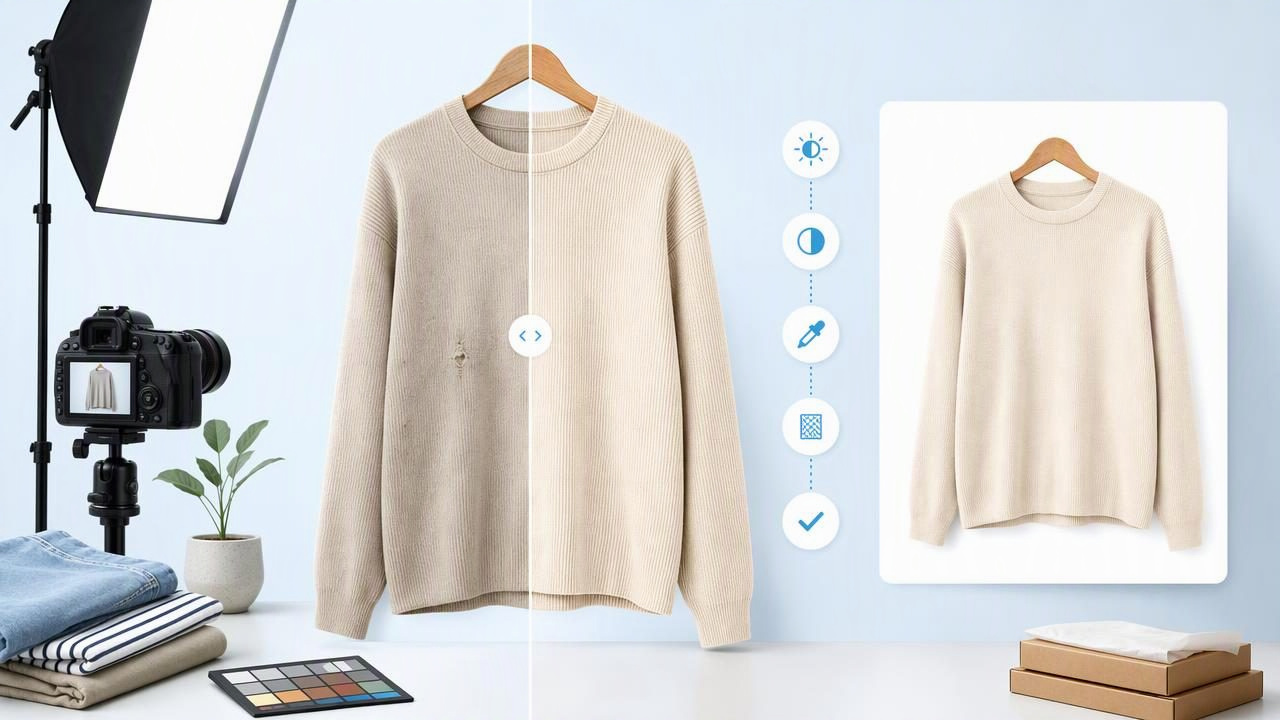
A clothing photo editor can help resellers, boutiques, and fashion brands create cleaner product images without making garments look misleading. The goal is not to transform an item into something it is not. Instead, good editing helps shoppers see the color, shape, neckline, sleeves, and overall condition more clearly.
For online clothing listings, photos do much of the work normally handled by an in-store fitting room. A buyer cannot touch the fabric, inspect the seams, or see how a shirt hangs from every angle. Clear images reduce uncertainty, support buyer trust, and make it easier for shoppers to decide whether an item matches their needs.
This guide explains a practical workflow for editing apparel photos while keeping the listing honest. It covers background removal, wrinkle retouching, cropping, brightness adjustments, and presentation choices such as flat lays, hangers, folded garments, and ghost mannequin images.
What a Clothing Photo Editor Should Improve
The most useful clothing photo edits remove distractions rather than alter the product itself. An image should still represent the real garment you are selling, including its visible wear, texture, color variation, and fit-related details.
Appropriate edits usually include:
- Removing a cluttered or inconsistent background
- Brightening a dark photo so garment details are easier to see
- Straightening an image or correcting a slightly uneven crop
- Reducing minor presentation wrinkles caused by folding or storage
- Centering the garment and creating consistent margins
- Using a clean white or neutral background for marketplace-ready images
- Creating a ghost mannequin presentation from suitable garment photos
Edits should not hide stains, holes, pilling, missing buttons, fading, pulls, altered hems, or other condition issues. Those details matter to buyers. Photograph them separately and describe them clearly in the listing.
Start With a Photo That Is Worth Editing
Editing works best when the original image is reasonably well lit and in focus. Even the best clothing photo editor cannot reliably recover fine details that were never captured, such as a blurry care label or a subtle knit texture lost in harsh shadows.
Before taking photos, check these basics:
- Use even light. Window light or soft indoor lighting helps reveal the true color and texture of the garment. Avoid strong overhead shadows when possible.
- Clean the lens. A quick wipe can prevent haze that makes fabric look dull.
- Choose a simple setup. Use a plain wall, backdrop, floor, or table with enough contrast to separate the garment from its surroundings.
- Show the full item. Take at least one complete front view before shooting close-up details.
- Take multiple views. Include the back, tags, fabric details, closures, pockets, labels, and any flaws.
A strong original photo gives you more flexibility while keeping your final listing believable. It also makes background removal and garment-edge detection more reliable.
Choose the Right Clothing Presentation Before Editing
The presentation style affects what buyers can understand at a glance. There is no single best format for every garment. Choose the layout that shows the item most clearly.
| Presentation Style | Best For | What It Shows Well | Watch Out For |
|---|---|---|---|
| Flat lay | T-shirts, denim, sweaters, casual pieces | Overall shape, print placement, measurements | Can make structured garments look flatter than worn |
| On hanger | Blouses, dresses, jackets, lightweight pieces | Length, drape, neckline, sleeve shape | Hanger shape may slightly affect shoulder appearance |
| Folded | Knitwear, activewear, packaged items | Fabric, logo, texture, compact presentation | Does not show full silhouette |
| Ghost mannequin | Structured tops, dresses, jackets, shirts | Garment shape and interior neckline | Should not imply an exact fit on every body type |
For example, a ribbed cardigan may be photographed on a hanger for the main image, laid flat for width and length measurements, and photographed close up to show the knit texture. A ghost mannequin image can add a polished front-facing view, but it should supplement—not replace—detail photos that show the actual item.
A Practical Clothing Photo Editor Workflow
Use a repeatable sequence rather than applying every available effect to every photo. This keeps your catalog consistent and helps prevent over-editing.
1. Select the clearest original image
Start with the sharpest, best-lit image where the garment is fully visible. If you have several near-identical photos, choose the one with the truest color and least distracting folds. Save the original image before editing so you can compare the result against it.
2. Crop for consistency, not exaggeration
Crop the garment with a similar amount of space around it across your listings. This creates a more organized storefront and helps shoppers compare items quickly. Avoid cropping so tightly that hems, sleeves, or important shape details disappear.
For a marketplace cover image, center the item and leave a clean border around the edges. For detail images, crop closer to the label, embroidery, button, or flaw being documented.
3. Remove distracting backgrounds carefully
Background removal is useful when you photograph inventory in different rooms, near racks, or on surfaces that do not match. A white or light neutral background can make product pages feel more consistent and direct attention to the clothing.
After removing a background, inspect the garment edges closely. Pay extra attention to:
- Straps and thin sleeves
- Fringe, lace, crochet, and sheer fabric
- Fur-like trims and feathered edges
- Dark garments against dark original backgrounds
- Open collars, cutouts, and layered hems
If an edge looks jagged, partially erased, or unnaturally smooth, use the original photo as a reference. Clean presentation matters, but preserving the actual outline of the garment matters more.
4. Correct brightness and color with restraint
Adjust exposure only enough to make the garment easy to see. A black blazer should still look black, not charcoal gray; a cream blouse should not become bright white; and a vivid red dress should not appear neon.
A useful check is to compare the edited image side by side with the garment in normal light. If the listing photo no longer resembles the item, reduce the intensity of your adjustments. Accurate color is especially important for buyers searching for specific shades such as olive, burgundy, ivory, or cobalt.
5. Retouch presentation wrinkles without changing construction
Minor wrinkles from shipping, folding, or laying an item on a surface can distract from an otherwise strong image. Light wrinkle retouching can help a garment look more orderly. However, do not remove folds that communicate the item’s design, fabric weight, drape, gathering, pleating, or wear.
For instance, consider a linen button-up shirt with a few shallow storage creases across the body. Reducing those creases can improve the main image. But the natural texture of linen, the fold at the sleeve cuff, and the slight rumpling around the buttons should remain visible. Removing every line may make the fabric look artificial and can give buyers an inaccurate expectation.
6. Review all visible condition details
Before publishing, compare the edited photo with the original. Ask whether the image still shows the garment honestly. If there is pilling near the underarm, a faint mark at the hem, or a repaired seam, add dedicated close-up photos. Editing should improve clarity, not conceal information a buyer would reasonably want to know.
Use a Simple Quality Check Before Listing
A quick review prevents common mistakes that can reduce trust or lead to buyer questions. Use this checklist for your final clothing photos:
- Is the item fully visible in at least one image?
- Does the edited color match the garment in ordinary light?
- Are the garment edges intact after background removal?
- Are logos, labels, prints, and fabric texture still recognizable?
- Have visible flaws been kept visible and photographed separately?
- Does the chosen presentation show the item’s shape appropriately?
- Do the images use a consistent crop and background across the listing?
Common Clothing Photo Editing Mistakes
Over-editing is often more damaging than under-editing. Buyers may notice when an item looks materially different in person than it did online, and that disconnect can lead to disappointment.
A polished image should make the garment easier to assess, not harder to assess.
Common problems include smoothing knitwear until the texture disappears, whitening backgrounds so aggressively that garment edges are lost, increasing saturation until colors look inaccurate, and using a presentation style that implies a shape the garment may not have when worn.
Ghost mannequin images are especially helpful for showing form, but they cannot guarantee exact fit, body proportion, sleeve length, or drape on an individual shopper. Include measurements and material information alongside the images to give buyers a more complete picture.
Build a Consistent Visual Standard for Your Store
Consistency makes a resale closet or e-commerce catalog easier to browse. You do not need identical lighting setups for every item, but aim for a repeatable standard: similar backgrounds, full-item cover images, accurate color, visible details, and a predictable order of photos.
A helpful listing order might be:
- Full front view
- Full back view
- Side view or shape-focused image
- Brand and size label
- Fabric, print, or construction close-up
- Any flaw or condition detail
- Measurements where useful
This approach gives shoppers the information they need while allowing your best edited image to work as a clean, attention-grabbing cover photo.
Final Thoughts
A clothing photo editor is most valuable when it supports accurate e-commerce photography. Use it to remove distractions, improve lighting, create consistent backgrounds, and make minor presentation issues less noticeable. Keep fabric texture, construction details, color accuracy, and visible condition issues real.
For sellers who want guidance on refining garment presentation, Clothing Studio’s guide to removing clothing wrinkles in photos explains how wrinkle retouching can be used thoughtfully while preserving an honest view of the item.
