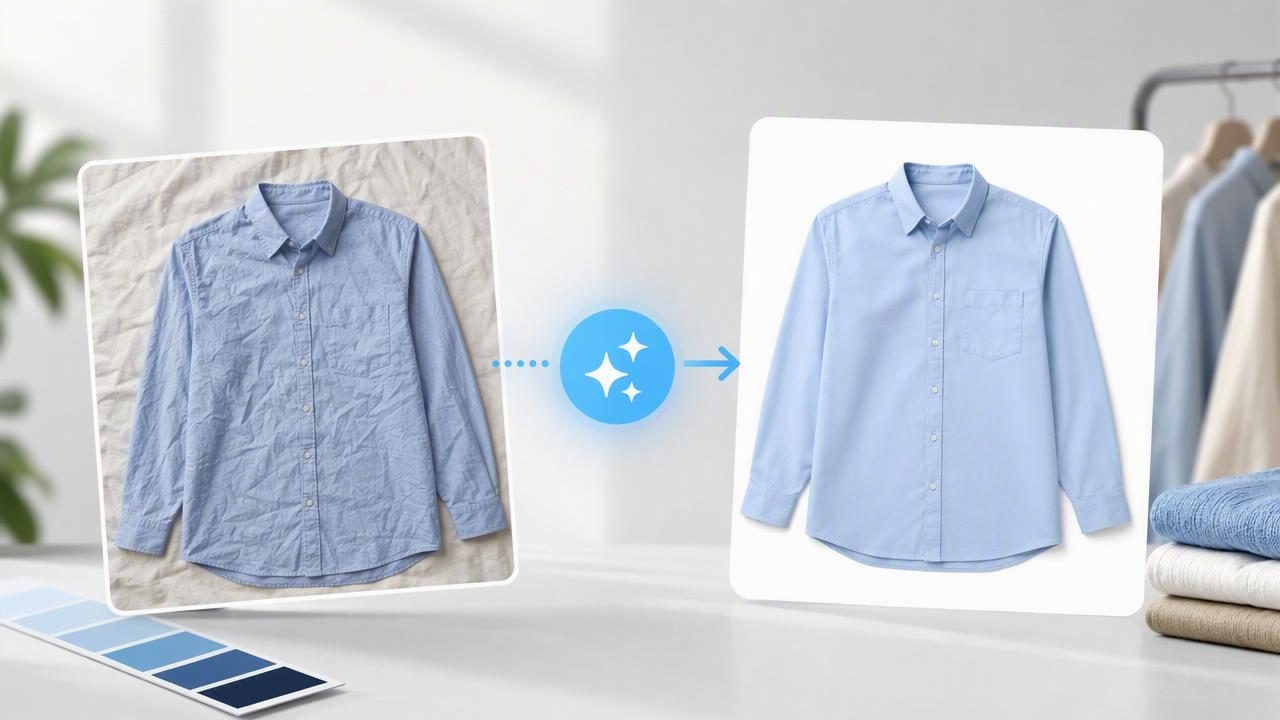
For fashion resellers, boutique owners, and growing apparel brands, product images do much more than document an item. They show shoppers the condition, fit, color, and overall value of a garment before it arrives at their door. Since online buyers cannot touch the fabric or try on the piece, your photos carry much of the responsibility for earning their confidence.
A clothing photo editor helps turn a quick phone snapshot into a polished listing image without requiring expensive lighting, a studio rental, or advanced design experience. The goal is not to make clothing look misleadingly perfect. It is to present every item clearly, consistently, and attractively so shoppers can make informed decisions.
This guide explains what to look for in a clothing photo editor, which edits matter most, and how to build an efficient photo workflow for e-commerce.
Why Clothing Photo Editing Matters for Online Sales
In a marketplace search result or collection page, shoppers often see dozens of similar items at once. A dark image, distracting bedroom background, wrinkled shirt, or inconsistent crop can make an otherwise excellent item easy to skip. Clean images help the product become the focus.
Strong clothing presentation can support better listing performance because it helps buyers answer common questions quickly:
- What is the true color of the garment?
- What is the overall shape and silhouette?
- How does the fabric hang or drape?
- Are there visible condition issues?
- Will this item look like it belongs in my wardrobe?
Editing also improves consistency across your store. When every item has a similar background, brightness level, image size, and framing style, your storefront looks more organized. That consistency can make even a small resale shop feel more dependable and professional.
What a Clothing Photo Editor Should Help You Do
The best editing process is not necessarily the one with the most buttons. It is the one that removes repetitive work while preserving accurate product details. For apparel listings, prioritize tools that solve the visual problems you face most often.
| Editing Feature | Why It Helps Clothing Listings | Best Use Case |
|---|---|---|
| Background removal | Eliminates visual distractions and creates a consistent catalog look. | Marketplace listings, product grids, and brand collections. |
| Brightness and color correction | Makes fabric color and garment details easier to assess. | Photos taken in uneven indoor lighting. |
| Wrinkle reduction | Creates a neater presentation while keeping the garment realistic. | Shirts, dresses, trousers, and knitwear. |
| Crop and resize tools | Improves composition and helps meet platform image requirements. | Poshmark, eBay, Shopify, Depop, and social posts. |
| Ghost mannequin effects | Shows the structure of an item without a visible model or mannequin. | Jackets, dresses, activewear, and tailored garments. |
| Model image generation | Provides styling context when a flat or hanger photo is not enough. | Fashion-forward listings and merchandising campaigns. |
Not every item needs every feature. A simple cotton tee may only require a clean background and careful cropping. A formal blazer, however, can benefit from wrinkle cleanup and a ghost mannequin presentation that reveals its shoulders, lapels, and shape.
Start with a Good Source Photo
A clothing photo editor can improve presentation, but it cannot fully replace a usable original image. Starting with a clear photograph gives you more natural-looking results and reduces the time spent fixing preventable issues.
Set up the garment carefully
Before taking photos, inspect the item. Lint-roll it, button it, straighten collars, align seams, and place sleeves naturally. If you are photographing folded clothing, make the fold crisp and intentional. For on-hanger images, use a clean, simple hanger and make sure the garment is centered.
Use soft, even light
Natural window light is often enough for resale photography. Place the clothing near indirect light rather than in direct sun, which can cause harsh shadows and washed-out colors. If you use lamps, aim for even illumination from more than one direction.
Keep the camera steady and square
Hold your phone parallel to the garment whenever possible. Shooting at a steep angle can distort proportions, particularly on flat-lay photos. Take several views: front, back, close-ups of labels, fabric texture, and any flaws. Editing should enhance the product, not hide information buyers need.
A Simple Clothing Photo Editing Workflow
A repeatable workflow saves time as inventory grows. Rather than editing one image from start to finish before moving to the next, batch similar tasks together. For example, photograph all items first, remove backgrounds next, then crop and export the finished files.
- Select your strongest source photos. Choose sharp, well-lit images that show the garment clearly.
- Correct overall lighting. Raise brightness gently, balance shadows, and avoid excessive contrast that hides texture.
- Adjust color with care. Compare the image with the real garment in neutral light. Accurate color is more valuable than a dramatic filter.
- Remove or replace the background. Use a plain white, light gray, or brand-appropriate neutral background for consistency.
- Clean up distracting wrinkles. Reduce only the wrinkles that make the item look poorly presented. Keep natural drape and fabric texture intact.
- Choose the right presentation style. Use flat lay, hanger, ghost mannequin, or model imagery based on what best communicates the item.
- Crop for the platform. Leave enough breathing room around the garment and avoid cutting off hems, sleeves, or important details.
- Review before publishing. Zoom in to check for inaccurate cutouts, strange edges, color shifts, or edited areas that look unnatural.
Choosing the Right Clothing Presentation Style
There is no universal best format for apparel photography. The right choice depends on the garment type, the sales channel, and what shoppers need to understand before buying.
Flat-lay clothing photos
Flat lays work well for casual clothing, vintage pieces, kidswear, graphic tees, scarves, and folded knitwear. They are quick to shoot and make it easy to show details such as prints, embroidery, and tag information. Arrange the item neatly, use a consistent surface, and avoid heavy shadows around the edges.
On-hanger clothing photos
Hanger photos are especially useful for dresses, blouses, skirts, and lightweight garments. They show how fabric falls vertically and require less setup than mannequin photography. The main risk is a visible room background or a hanger that distracts from the garment, both of which can often be improved through background removal.
Ghost mannequin images
A ghost mannequin image creates the impression that a garment is being worn while keeping the mannequin invisible. This style is helpful for structured clothing because it reveals shape, neckline, armholes, and internal depth. It can make a product catalog look more cohesive, particularly for items such as coats, blazers, button-downs, and activewear.
Model shots
Model images add context. They can help shoppers imagine scale, styling, and how a garment may fit in real life. Use them carefully and ensure the result remains believable. The clothing should match the original item in color, length, pattern, and key construction details. If a listing uses generated lifestyle imagery, include clear product-only photos as well.
Editing Mistakes That Can Hurt Buyer Trust
Professional editing should make a listing easier to understand, not create uncertainty. Over-editing can lead to inaccurate expectations and avoidable returns.
- Changing the garment color: Avoid filters that turn cream into bright white or navy into black.
- Erasing wear or flaws: Small stains, pilling, pulls, and repairs should be disclosed rather than removed.
- Over-smoothing fabric: Denim, linen, wool, and ribbed knits should still look like their real materials.
- Using inconsistent backgrounds: A mix of busy rooms, dark carpet, white cutouts, and outdoor shots can make a shop feel disjointed.
- Creating poor cutout edges: Check around straps, hems, sheer fabric, fringe, and fuzzy knitwear for missing details.
- Cropping too tightly: Buyers need to see the garment’s full proportions, not just a close view of the center.
Practical rule: Edit the presentation, not the truth. A polished image should accurately represent what the buyer will receive.
How to Build Consistency Across Your Store
Consistency is one of the most valuable outcomes of using a clothing photo editor. Create a short visual checklist and apply it to every listing. Decide on one main background color, a standard crop style, a preferred first-image format, and a file naming approach.
For example, your internal listing checklist might look like this:
1. Front image: full garment, clean neutral background
2. Back image: full garment, matching crop
3. Detail image: label, print, or fabric texture
4. Condition image: any flaws shown clearly
5. Optional image: ghost mannequin or styled model view
This structure makes your listings easier to scan and speeds up your own publishing process. It also ensures that important condition details are not forgotten when you are processing a large inventory batch.
Make E-Commerce Photography Faster Without Losing Quality
Efficiency does not mean rushing. It means reducing repeated decisions. Photograph similar items together, keep your shooting space ready, and use the same editing order every time. Save preferred crops and backgrounds where possible, then review finished images with fresh eyes before uploading.
For sellers who photograph inventory on an iPhone, AI-powered tools can make background cleanup, garment presentation, and light touch-ups much faster than manual editing. Apps such as Clothing Studio are designed around these common apparel workflows, helping sellers spend less time on repetitive edits and more time listing accurately.
Ultimately, the best clothing photo editor is one that helps you publish clear, consistent, honest images at a pace your business can maintain. When shoppers can immediately see what they are buying, your listings are better positioned to earn clicks, confidence, and sales.