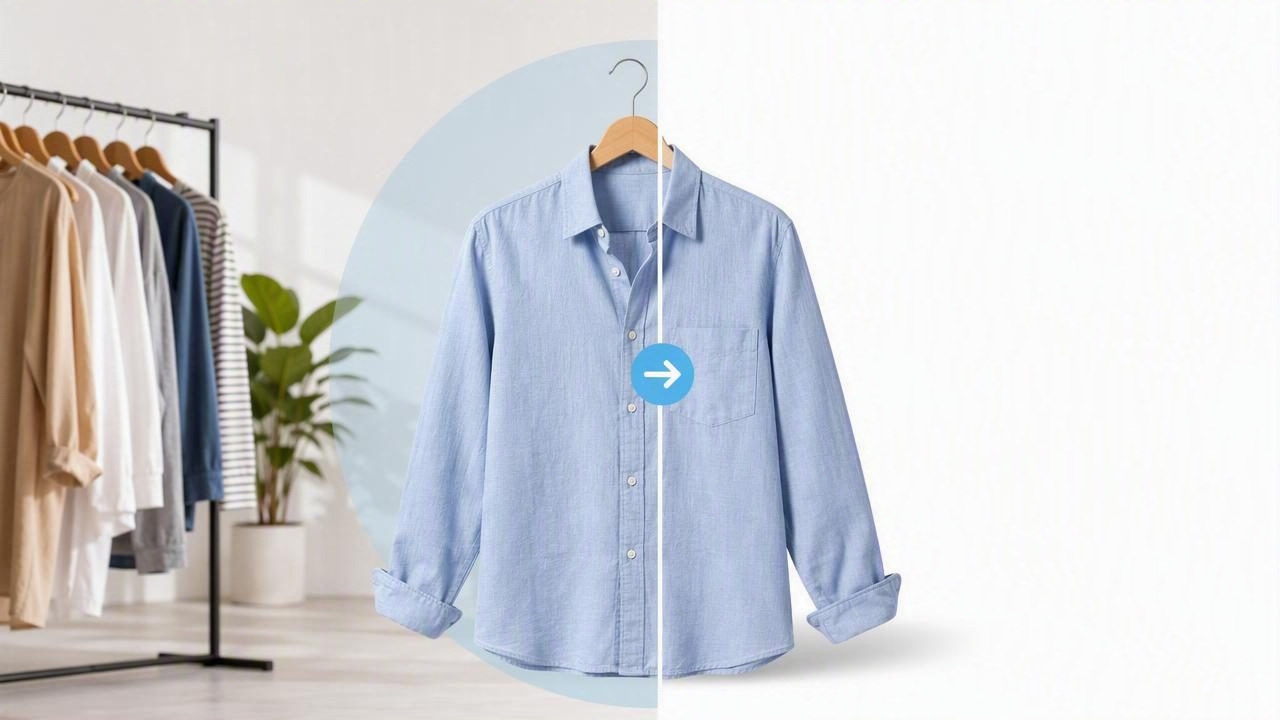
For fashion resellers, boutique owners, and apparel brands, product photos do much more than show what an item looks like. They communicate condition, fit, color, quality, and professionalism before a shopper reads a single word of the listing. A cluttered bedroom, uneven wall, busy rack, or distracting floor can pull attention away from the garment itself. That is where a clothing background remover becomes an essential part of an e-commerce photography workflow.
Removing a background from clothing images helps create a cleaner, more consistent storefront across marketplaces and social channels. Whether you sell on Poshmark, eBay, Depop, Shopify, Etsy, or your own website, polished images can make it easier for buyers to focus on the details that matter: the fabric, silhouette, print, neckline, and condition of the garment.
This guide explains how clothing background removal works, when to use it, what results to aim for, and how to create product photos that feel accurate rather than overly edited.
Why Backgrounds Matter in Clothing Listings
Online shoppers cannot touch the fabric, inspect a zipper, or hold a garment up to see its shape. They depend on photos to reduce uncertainty. When the background is simple and consistent, buyers can assess the item faster. The clothing becomes the visual priority instead of competing with surrounding distractions.
A strong background also supports a more recognizable shop aesthetic. If every listing has a different room, lighting setup, or surface behind it, your storefront may look inconsistent. That does not mean every photo must look identical, but a cohesive presentation makes browsing easier and can make your inventory feel more curated.
For example, imagine a buyer comparing two identical black blazers. One is photographed on a carpet beside a laundry basket. The other is shown against a bright, neutral background with visible lapels, buttons, and sleeve shape. Even if both items are in the same condition, the cleaner presentation can feel more trustworthy and easier to evaluate.
What Is a Clothing Background Remover?
A clothing background remover is a photo-editing tool that identifies the garment or product in an image and separates it from the surroundings. It can then replace the original setting with a plain white, light gray, neutral, or transparent background.
Modern AI photo editing tools are especially useful for apparel because clothing has visual details that basic editing methods can struggle with. Thin straps, soft edges, sheer materials, textured knits, fur trims, puff sleeves, and loose hems all require careful separation. The goal is not simply to erase everything behind the garment. The goal is to preserve the clothing's natural edges and proportions.
Depending on the tool and the image, the background can be removed in a few seconds. However, the best results still begin with a good original photo. AI can streamline editing, but it cannot fully fix poor lighting, extreme blur, or a garment that blends into the background.
Benefits of Removing Backgrounds From Clothing Photos
- More focus on the garment: Buyers can immediately see the item rather than the environment around it.
- Consistent storefront branding: A uniform background makes listings look organized across categories and seasons.
- Faster listing production: Instead of setting up a perfect physical backdrop for every item, sellers can edit photos after shooting.
- Better image reuse: A clean cutout can be used for marketplace listings, social media, lookbooks, ads, and website product pages.
- Flexible presentation: The same garment can be shown as a flat lay, on a hanger, on a mannequin, or as a ghost mannequin image.
- Improved buyer clarity: Neutral backgrounds make colors, patterns, and construction details easier to view.
Background removal can also be particularly helpful for sellers working from home. You do not need a dedicated studio to create an appealing listing photo. A well-lit area, a reasonably clear shooting space, and an efficient editing process can go a long way.
Choose the Right Background for Your Sales Channel
Once the original background is removed, you need to decide what should replace it. The best option depends on the platform, garment type, and visual style of your shop. In most cases, simple backgrounds perform better than decorative ones because they keep the clothing easy to inspect.
| Background Type | Best Use | Why It Works |
|---|---|---|
| Pure white | Marketplace listings and product catalogs | Clean, familiar, and ideal for a consistent catalog look |
| Light gray | White, cream, or very pale garments | Adds subtle contrast without distracting from the item |
| Soft neutral | Vintage shops and curated boutiques | Can support a warm, branded aesthetic while staying understated |
| Transparent | Web design, graphics, and layered marketing assets | Provides maximum flexibility for future use |
| Natural setting | Lifestyle or social media images | Adds context, but should not replace clear product-detail photos |
White backgrounds are common for a reason: they are clean, versatile, and familiar to shoppers. Still, a bright white background is not always ideal. A white blouse photographed against pure white can lose its outline. In that situation, a very pale gray background may provide enough separation to show the garment accurately.
How to Get Better Results Before You Edit
The easiest way to improve background removal is to make the original photograph as clear as possible. You do not need expensive lighting or a professional camera, but a few practical habits will improve the final cutout.
- Use even lighting. Photograph near a window with indirect daylight, or use soft artificial light. Avoid harsh shadows across the garment.
- Create contrast. Do not photograph a black dress against a dark wall or a white tee against a white sheet. Contrast helps the editing tool recognize the garment's edges.
- Clear the area around the item. Keep hangers, furniture, hands, price tags, and other objects away from the outline where possible.
- Center the garment. Leave a small amount of space around the item so sleeves, hems, and straps are not cut off.
- Smooth the clothing first. Steam or flatten the garment when appropriate. Wrinkles can make an item appear less cared for and can obscure its intended shape.
- Take several angles. Capture front, back, labels, fabric close-ups, flaws, and measurements separately. Your primary image should be clean, but supporting photos should answer buyer questions.
These steps are useful even if you use an AI tool. Better input photos generally produce better, more realistic output.
Common Clothing Background Removal Mistakes
Cutting Off Fine Details
Thin straps, fringe, lace, belts, drawstrings, and flutter sleeves can sometimes disappear or look jagged after editing. Always inspect the edges before publishing. If a detail looks inaccurate, try a different original image with more contrast or adjust the image manually when possible.
Using an Unnatural Shadow
A subtle, realistic shadow can help a garment feel grounded. But a dark, heavy, or misplaced shadow can make an item look like it is floating. For most resale listings, a clean background with little or no shadow is safer than an exaggerated effect.
Changing the Product Color
Editing should improve presentation, not alter the item. Watch for color shifts after background replacement, especially with whites, blacks, reds, and saturated prints. Compare the edited result with the original photo under neutral lighting. Accurate color is a major factor in reducing disappointed buyers and return requests.
Relying on One Edited Image
A polished main image is valuable, but it should not be the only image in a listing. Include original detail shots that show fabric texture, labels, size tags, hardware, and any imperfections. Transparency is especially important for pre-owned clothing.
Best practice: Use a clean background to attract attention, then use detailed supporting images to build confidence.
Background Removal vs. Ghost Mannequin Photography
Background removal and ghost mannequin photography are related, but they serve different purposes. Background removal isolates a garment from its surroundings. A ghost mannequin effect goes further by creating the appearance that the clothing is being worn, while removing the mannequin or model from view.
For structured items such as blazers, dresses, jackets, shirts, and activewear, a ghost mannequin presentation can help buyers understand the garment's shape and fit. For casual pieces, accessories, or simple flat lays, a clean background may be all you need.
- Use background removal when your existing photo already shows the product clearly.
- Use ghost mannequin imagery when fit, volume, neckline, or interior construction needs more visual context.
- Use both when you want a polished main image plus additional photos that show the garment from multiple perspectives.
A Simple Workflow for Faster E-Commerce Photography
Consistency is more valuable than perfection when you are photographing a large volume of inventory. Instead of reinventing your setup for every garment, build a repeatable workflow that reduces decision fatigue.
- Sort clothing by type, color, and presentation style.
- Steam, lint-roll, and inspect each item before photographing it.
- Take clear front, back, detail, label, and flaw photos.
- Select the strongest front image as the primary listing photo.
- Use a clothing background remover to create a clean, consistent main image.
- Review edges, color, garment shape, and any missing details.
- Add the finished photos to your listing with accurate titles, measurements, and condition notes.
This process can be completed in batches. For instance, photograph ten items first, then edit ten main images, then write listings. Batching similar tasks helps many sellers work faster than switching constantly between styling, photography, editing, and writing.
How Clean Images Support Better Buyer Trust
Professional-looking photos do not have to feel overly commercial. In resale, shoppers often appreciate honest images that show the real item. The strongest approach balances polish with transparency. Remove distracting backgrounds, but do not hide wear, stains, pilling, fading, or alterations.
Think of your primary image as the invitation and your remaining photos as the proof. A clean cutout earns the initial click. Clear close-ups and accurate descriptions help buyers feel confident enough to purchase.
When done well, background removal supports the entire clothing presentation process: it makes browsing easier, creates a more cohesive shop, and helps every garment receive the attention it deserves. Tools such as Clothing Studio can help sellers streamline this workflow while keeping the focus on accurate, appealing apparel photos.