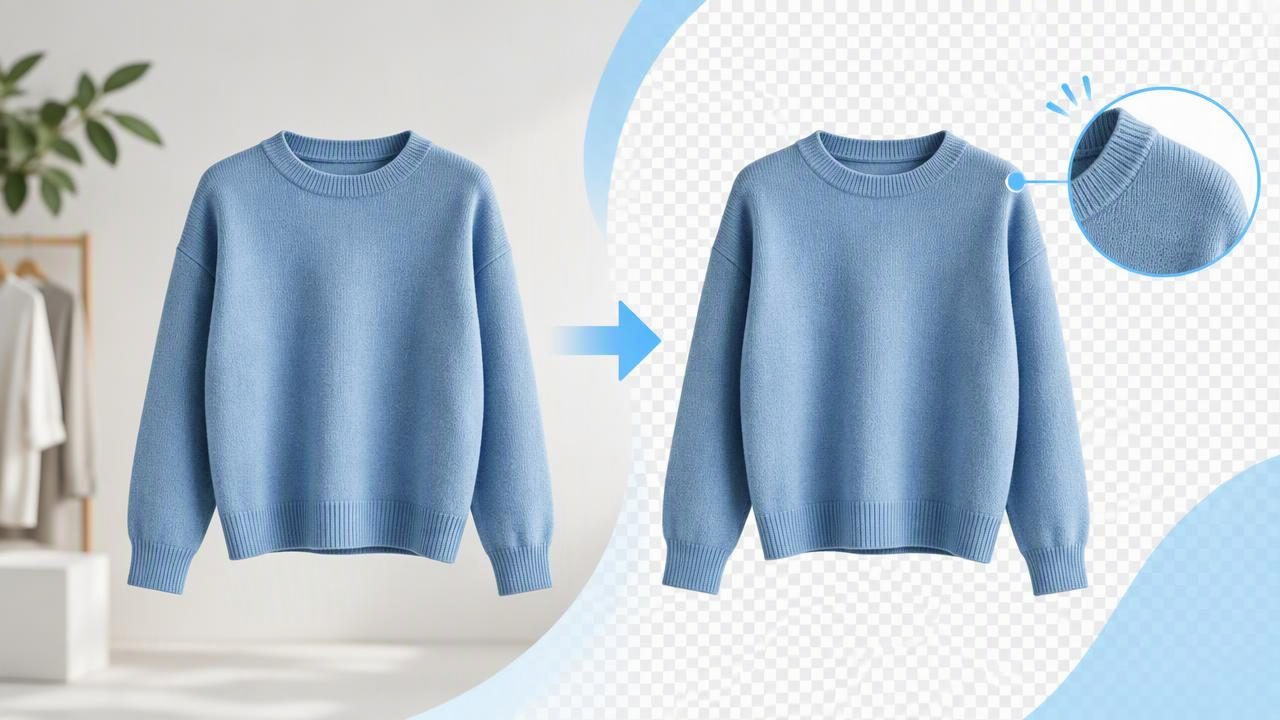
A background remover can make a clothing listing look cleaner and help shoppers focus on the item. But removing a background is not just a matter of making everything around a garment disappear. Thin straps, loose threads, lace, shadows, and dark fabric against a dark surface can all make the cutout less accurate.
For fashion resellers, a useful edit makes the product easier to inspect without changing what the buyer will receive. This guide explains what background removal can and cannot do, how to check the result, and how to choose a replacement background that supports an honest listing.
What a background remover does to a clothing photo
A background remover identifies the main subject in an image and separates it from the surrounding scene. Depending on the tool, it may leave a transparent area, add a solid color, or let you place the garment on another background. The goal is to reduce distractions, not to redesign the item.
Clothing is a challenging subject because its outline is often irregular. Sleeves may hang away from the body, fabric can fold into the background, and sheer sections may show what is behind them. The software has to decide which pixels belong to the garment and which belong to the scene. That decision can be imperfect, so inspect the edited image rather than assuming the outline is correct.
Why clean edges matter in fashion listings
Shoppers rely on photos to judge a garment’s shape, color, condition, and details. A rough cutout can make an item look distorted or poorly presented. More importantly, an edit that removes part of a hem, strap, or sleeve may hide information a buyer needs.
- Clear outlines help viewers understand the garment’s silhouette.
- Visible details let shoppers assess features such as buttons, seams, collars, and pockets.
- Consistent backgrounds can make a group of listing images feel organized.
- Accurate presentation supports buyer confidence when the item arrives.
A polished image should still resemble the actual item. Do not treat background removal as a way to conceal flaws, reshape a garment, or imply a fit that the original photo cannot show.
Where background removal can struggle
Some photos are harder to isolate than others. Knowing the common problem areas helps you decide whether an edit is usable or whether a different source photo would be clearer.
| Photo detail | What may go wrong | What to inspect |
|---|---|---|
| Thin straps or loose threads | Small sections may disappear or look clipped. | Check both sides of each strap and any fine edges. |
| Lace or sheer fabric | The tool may fill transparent areas or remove fabric detail. | Look closely at the openwork and see whether the original texture remains visible. |
| Dark garment on a dark background | The outline may blend into the scene and be cut unevenly. | Review sleeves, hems, and folds against a contrasting display background. |
| Fuzzy knits or fringe | Soft fibers can become jagged or disappear. | Zoom in around the edges and compare them with the source image. |
| Strong cast shadows | Part of the shadow may remain, or the cutout may look unnaturally flat. | Decide whether a subtle natural shadow helps show the garment’s shape. |
These limitations are especially important for vintage, handmade, or delicate pieces, where small details may be part of the item’s value. If an edge looks uncertain, keep the original image available and choose a clearer source photo when possible.
A practical example: isolating a black cardigan
Imagine photographing a black cardigan on a charcoal-colored wall. The sleeves blend into the background, and one cuff is folded inward. A background remover may separate most of the cardigan, but it could trim part of a sleeve or leave a dark halo around the cuff. Placing the result on a bright white background might make that mistake more noticeable, but it does not correct the missing fabric.
Compare the edited result with the original at the same scale. Check the shoulder line, both sleeve edges, the hem, and the space between the cardigan’s front panels. If the outline differs from the source, do not assume the original garment had that shape. Retake the photo against a lighter, uncluttered surface if you can. If the source cannot be replaced, use only an edit that keeps the garment’s visible outline and details faithful.
This comparison also helps with shadows. A faint shadow under a hanging or laid-out item may communicate depth. Removing every shadow can make a garment appear detached from the scene, while leaving a heavy or uneven shadow may distract from the item. The right choice depends on the original presentation and the accuracy of the result.
Choose a background that helps shoppers inspect the item
A replacement background should make the garment easy to see without competing for attention. A plain, neutral setting is often a practical choice for a listing image, but contrast matters more than choosing one universal color. White fabric can disappear on a bright background; black fabric can lose its outline on a dark one.
- Use enough contrast to make the garment’s outline readable.
- Keep the setting simple so patterns or props do not distract from the product.
- Check color appearance on the final image. A new background can change how a garment’s color seems by comparison.
- Keep a consistent style across a listing or shop when it does not compromise visibility.
- Do not add context that suggests something untrue, such as a setting that implies a garment is being worn when it is not.
If you use a transparent cutout in another layout, check it against the actual display background before publishing. A fringe that looks fine over gray may become difficult to see over white. Previewing on the intended background catches issues that are easy to miss on a checkerboard transparency preview.
Background removal with flatlay, hanger, and ghost mannequin images
Background removal can support different clothing presentations, but it does not make those presentations interchangeable. A flatlay shows a garment arranged on a surface. A hanger photo shows how it hangs, while a ghost mannequin image presents a garment as if it has volume without showing the mannequin. Each format communicates different information about shape and construction.
Removing the original background does not automatically create a reliable ghost mannequin view, reveal hidden areas, or show exact fit on a person. It only changes the image’s separation from its background. Keep the source image and the final presentation in agreement about what is visible. If an edit introduces a neckline, interior, or garment shape that the original does not support, it may mislead shoppers.
For a listing, consider using the edited image as one view rather than the only view. Additional unaltered photos can show the garment’s condition, labels, closures, fabric, and any imperfections. Follow the marketplace’s current image rules, too; requirements can differ by platform and may change.
A quick quality check before publishing
Review the edited image at both normal viewing size and a closer zoom. Ask these questions:
- Is the full garment present? Check the hem, collar, cuffs, straps, and any loose parts.
- Does the outline match the source? Watch for clipped fabric, halos, or added-looking edges.
- Are sheer and textured areas still understandable? Compare lace, knit, fringe, or mesh with the original.
- Does the background provide useful contrast? Make sure the garment does not blend into it.
- Are condition details still visible? Background cleanup should not hide stains, wear, repairs, or flaws.
- Does the image represent the listing accurately? Avoid edits that suggest a different color, shape, size, or fit.
If the result fails one of these checks, use a different source image or a less aggressive edit. An imperfect but honest photo is more useful to a buyer than a polished image that obscures the item.
When to retake the photo instead
Background removal is not always the best fix. Retake the photo if the garment’s edge is too blurry to distinguish, the lighting hides important details, the item is partly outside the frame, or a background color merges with the fabric. A simpler source image can make the final presentation easier to assess.
Also consider whether the photo’s layout suits the item. A folded image can work for a compact knit, while a hanger view may be clearer for a long dress. Background editing cannot compensate for a pose or arrangement that hides the garment’s important features.
Make the edit serve the listing
A background remover is most useful when it reduces clutter while preserving the garment’s real outline, texture, and condition. Check difficult edges, choose a background with appropriate contrast, and compare the finished image with the original before using it. When an edit changes or obscures product information, return to the source photo or take another one.
For sellers exploring related garment presentations, Clothing Studio’s guide to ghost mannequin photos offers a look at that format and its role in clothing imagery. Whichever editing approach you use, keep clear original photos alongside edited presentation images so buyers can make an informed decision.
