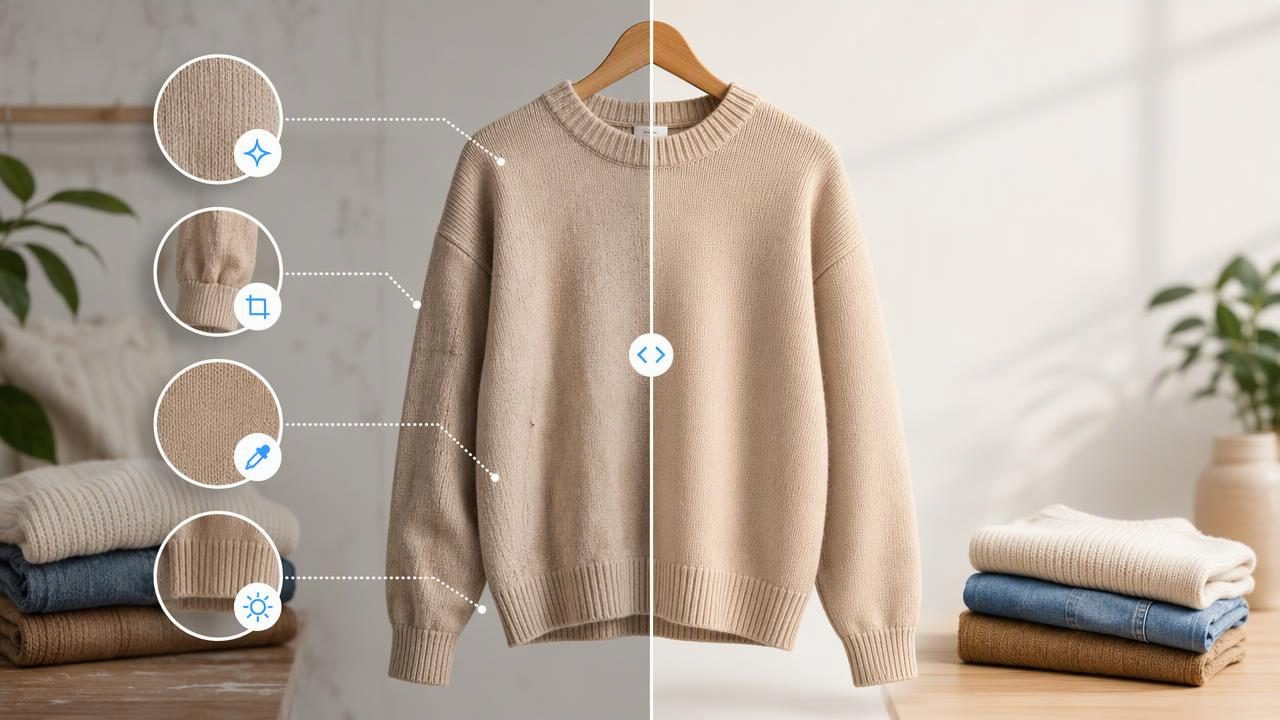
An AI photo editor can help clothing sellers create cleaner, more consistent listing photos without turning every item into a misleading version of itself. For fashion resellers and e-commerce brands, the goal is not to make a garment look like something it is not. The goal is to make the item easier to see, compare, and evaluate online.
A buyer cannot feel fabric weight, check the condition of a zipper, or inspect the inside label through a screen. Your photos need to do much of that work. Good editing can remove distracting backgrounds, reduce presentation wrinkles, and create a consistent product-photo style. But editing should never hide stains, reshape a stretched neckline, change the true color, or imply a fit that the garment cannot realistically achieve.
This guide explains what an AI photo editor can responsibly improve in clothing photography, which details should remain untouched, and how to use edited images alongside original photos to build buyer confidence.
Why Clothing Listings Need Careful Photo Editing
Clothing is more difficult to photograph than many other resale items because it changes shape based on how it is styled. A blouse can look structured on a mannequin, relaxed on a hanger, or uneven when folded. A pair of jeans may look darker in a shadowed room than it does in daylight. Even a small wrinkle can make a new-with-tags item appear less appealing.
An AI photo editor can support a better presentation by helping sellers create images that are:
- Cleaner: Fewer distractions behind or around the garment.
- More consistent: Similar backgrounds and framing across a shop.
- More readable: Clearer product shape, neckline, sleeves, hem, and silhouette.
- More efficient: Less time spent manually retouching each listing photo.
However, buyer trust depends on accuracy. An edited primary image may encourage a click, but detailed supporting images help a buyer decide whether the item matches their expectations.
What an AI Photo Editor Can Improve Responsibly
Some edits improve the presentation of an item without changing its identity. These are generally useful for e-commerce photography because they reduce visual noise rather than alter product facts.
1. Removing a Distracting Background
Background removal helps the garment become the focal point. A cluttered bedroom, busy rack, patterned carpet, or uneven wall can pull attention away from the item being sold. Replacing that setting with a simple, neutral background can make listings look more organized and easier to browse.
After using background removal, inspect the edges closely. Areas around straps, lace, fringe, sheer panels, long hair-like fibers, and ruffled sleeves may need extra attention. If part of the garment disappears or the edge looks jagged, use the original photo or retake the image rather than presenting an inaccurate cutout.
2. Reducing Presentation Wrinkles
Light wrinkles caused by folding, storage, or hanging can distract from an otherwise well-kept garment. Wrinkle retouching may help a shirt, dress, or blazer look more polished in a listing image, especially when the original photo contains temporary creases that do not represent the garment’s intended presentation.
There is an important limit: wrinkle reduction should not erase the natural texture of linen, rib knits, pleats, puckering, quilting, distressed denim, or intentionally crinkled fabric. It also should not conceal permanent creasing, cracking, fabric pulls, or wear. Those are condition details, not presentation issues.
3. Improving the Garment’s Visual Structure
Some clothing photographs look flat because there is no body, mannequin, or clean styling surface showing the garment’s construction. A ghost mannequin presentation can help buyers understand the general shape of a jacket, dress, top, or sweater by showing the neckline, shoulders, sleeve placement, and body silhouette more clearly.
This can be particularly useful for structured pieces such as blazers, collared shirts, knitwear, and outerwear. Still, a ghost mannequin image is a presentation format, not a promise of exact fit. It cannot show how a garment will drape on every body type, and it should not replace measurements, fabric information, or photos of important condition details.
4. Adjusting Overall Brightness Carefully
Minor exposure adjustments can help a black dress retain visible seam details or help a white shirt look less gray from poor indoor lighting. The key word is minor. Your edited image should still resemble the item in person.
If a color shifts noticeably after editing, include an original photo taken in natural light and describe the color in words. For example, a listing can state: “Deep forest green; the close-up photo is the most accurate representation of the color.”
What You Should Never Edit Out of a Clothing Photo
Photos should help buyers make informed decisions. That means keeping visible condition and construction details honest, even when they are not perfect.
| Detail | How to Handle It | Why It Matters |
|---|---|---|
| Stains or discoloration | Photograph and disclose them. | Buyers need to assess condition accurately. |
| Snags, holes, or pilling | Use clear close-ups. | These affect value and expected wear. |
| Alterations | Show hems, taken-in seams, or repairs. | Alterations can affect fit and resale interest. |
| Fabric texture | Keep texture visible in detail images. | Texture influences comfort, quality, and appearance. |
| Color variation | Include a natural-light reference photo. | Color is a major purchase decision factor. |
| Measurements | Provide them in the description or photo set. | Editing cannot reliably communicate fit. |
Do not use editing to remove an issue just because it appears small in the image. A tiny spot may matter to one buyer, while a repaired seam may be completely acceptable to another. The buyer’s decision should be based on the real item, not a corrected version of it.
A Concrete Example: Editing a Pre-Owned Linen Dress
Imagine you are listing a pre-owned blue linen midi dress. It has a button-front design, short sleeves, and a tie waist. The dress is clean, but it has light fold creases from storage. One button has a small scuff, and the hem has a faint area of wear.
A responsible editing approach could look like this:
- Use a bright original image that shows the full front of the dress on a hanger or mannequin.
- Remove the busy background so the blue linen is easier to see.
- Reduce only the temporary storage wrinkles that make the front panel look untidy.
- Keep the recognizable linen weave and natural texture visible.
- Do not smooth away the scuffed button or worn hem.
- Add two close-up original photos: one of the button and one of the hem wear.
- Include the garment’s measurements and note that linen can have natural texture and creasing.
The final listing can use the polished image as a clear cover photo while keeping the unedited or minimally edited condition photos in the carousel. This gives buyers both a strong first impression and the information needed to purchase with confidence.
Helpful rule: Edit the setting and temporary presentation issues, not the garment’s true condition, construction, or color.
Compare Every Edited Image With the Original
Before publishing an edited clothing image, compare it side by side with the source photo. This quick review can catch problems that are easy to miss when looking only at the final result.
- Does the edited color still match the original garment?
- Are hems, cuffs, straps, and sleeve edges complete?
- Did the edit accidentally remove buttons, belt loops, logos, or stitching?
- Does the garment still have its real proportions?
- Are texture, print placement, and fabric details still believable?
- Have visible flaws remained visible where appropriate?
AI-generated edits may occasionally produce edge artifacts, unusual shadows, or simplified details. This is especially important with intricate garments such as embroidered dresses, sequined tops, crochet pieces, sheer blouses, and patterned knitwear. If the final image changes a meaningful detail, do not rely on it as your only listing photo.
Use Multiple Photo Types for a More Honest Listing
One polished hero image is useful, but it should not carry the entire listing. A stronger clothing presentation uses a mix of images that answer different buyer questions.
- Cover photo: A clean full-garment view with a simple background.
- Back view: Shows closures, seams, design details, and overall shape.
- Label photo: Confirms brand, size, and fabric composition when available.
- Detail photos: Highlight print, texture, hardware, embroidery, or construction.
- Condition photos: Show any flaws, signs of wear, or repairs clearly.
- Measurement photo: Gives buyers a practical reference beyond visual styling.
This approach is especially valuable when using ghost mannequin, hanger, flat lay, or folded clothing images. Each style can show something different. A flat lay may display a graphic tee’s artwork well, while a hanger photo can show the length of a maxi dress, and a ghost mannequin view can clarify the neckline and shoulder structure of a blazer.
Choose the Right Presentation for the Garment
The best format depends on what a buyer needs to understand first.
| Presentation Style | Best For | Watch For |
|---|---|---|
| Flat lay | Graphic tees, kidswear, casual tops, folded knitwear | Can make shaped garments look wider or flatter than worn. |
| On hanger | Dresses, skirts, lightweight tops, long garments | Shoulders may stretch or sit differently than on a body. |
| Ghost mannequin | Structured shirts, jackets, sweaters, dresses | Does not provide an exact fit simulation. |
| Folded | Jeans, sweaters, activewear, inventory overviews | Use additional images to show full length and shape. |
No single format is universally best. Use the one that communicates the garment most clearly, then add supporting photos for details that the main presentation cannot show.
A Practical Standard for AI-Edited Clothing Photos
Use an AI photo editor to make clothing easier to inspect, not harder to understand. A clean backdrop, reduced temporary wrinkles, and improved visual organization can elevate an e-commerce listing. But photos should continue to show what buyers will actually receive.
For sellers looking for an iOS option focused on clothing presentation, Clothing Studio’s guide to ghost mannequin photos explains how this format can help show garment shape; full app features require a subscription. Whatever tool you choose, review every result, retain original condition photos, and describe limitations clearly in the listing.
That balance between polish and transparency is what makes edited fashion resale photos useful: they make a listing look more professional while still allowing buyers to shop with realistic expectations.
