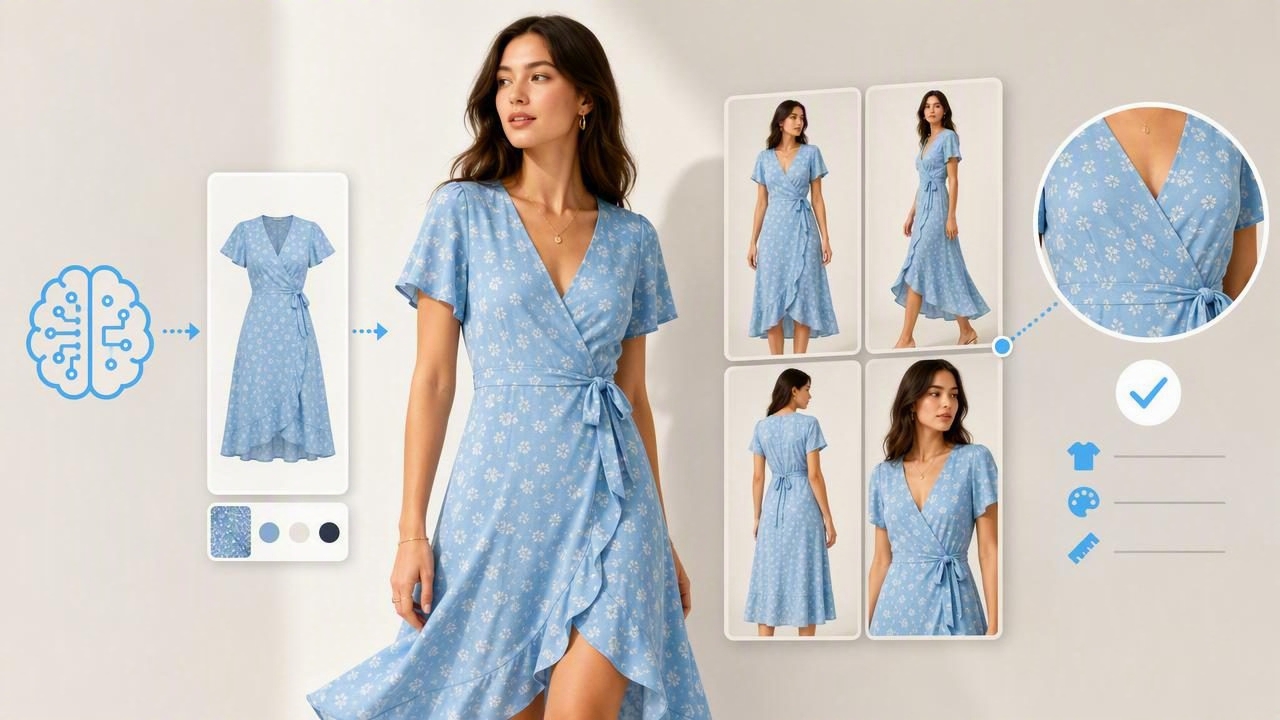
An AI fashion model image can help a clothing listing look more polished, styled, and easier to understand at a glance. For fashion resellers, boutiques, and growing e-commerce brands, model-style visuals can show how a garment may sit on a body instead of leaving shoppers to imagine it from a folded, hanger, or flatlay photograph.
However, AI-generated model images should support accurate product presentation rather than replace it. Buyers still need to see the real item, including its color, texture, measurements, condition, tags, seams, and any visible flaws. The best listing strategy combines clean original garment photos with carefully reviewed AI fashion model visuals that provide styling context.
This guide explains when to use AI fashion model images, how to choose the right garment photo, what to check before publishing, and how to avoid creating unrealistic expectations for buyers.
What Is an AI Fashion Model Image?
An AI fashion model image is a visual that presents clothing on a digitally generated or enhanced human model. Rather than arranging a live photoshoot for every item, a seller starts with a photograph of the garment and uses AI photo editing to create a model-style presentation.
This type of image can be useful for items that are difficult to visualize on a hanger or in a folded product photo. A blazer, dress, blouse, or pair of trousers may appear more understandable when shoppers can see the overall silhouette and styling direction.
Still, an AI fashion model image is a presentation tool, not proof of exact fit. It cannot reliably show how a specific garment will fit every body shape, how a fabric moves in real life, or the precise drape of a worn item. It also should not be used to hide wear, alterations, pilling, stains, missing buttons, or other condition details.
Why Model-Style Images Can Help Clothing Listings
Online shoppers cannot touch a garment, try it on, or inspect it from every angle before purchasing. Clear photos reduce some of that uncertainty. While front, back, close-up, and measurement photos remain essential, a model-style image can quickly communicate the intended use and broad shape of an item.
- More immediate context: Shoppers can better understand whether an item is fitted, oversized, cropped, longline, structured, or relaxed.
- Stronger styling cues: A model image can suggest whether a garment suits workwear, casual outfits, evening wear, or a seasonal wardrobe.
- Cleaner visual consistency: Sellers with varied inventory can create a more cohesive storefront when images have a similar presentation style.
- Useful support for single-item listings: Resellers often have one-of-one inventory and may not have access to a live model for every piece.
The important distinction is that an AI fashion model image adds context. It should not become the only image a shopper uses to evaluate the item.
Start With an Accurate Garment Photograph
The quality of the source photo affects the usefulness of any edited image. Before creating a model-style visual, photograph the actual garment in good, even lighting. A plain background helps the garment edges remain clear, while a clean, uncluttered setup keeps attention on the item itself.
For best results, make sure the clothing is laid out or hung in a natural position. Smooth obvious temporary wrinkles where possible, align shoulders and sleeves, button or zip the garment as it would normally be worn, and ensure hems are not tucked under. These simple steps make the true shape easier to interpret.
Photograph the item from more than one angle. Even if you plan to use only one AI fashion model image, your listing should include original views that document the actual piece.
Essential Original Photos to Keep in the Listing
- A clear front view of the real garment.
- A back view, especially for dresses, jackets, trousers, and outerwear.
- A close-up of the fabric, print, knit, embroidery, or texture.
- A label or tag photo when available.
- A measurement photo or written measurements in the description.
- Close-ups of any flaws, repairs, fading, or signs of wear.
These images establish trust because they document what the buyer will receive. The model-style image can then appear after the primary product photos or be clearly described as an enhanced presentation image.
A Concrete Example: Listing a Vintage Linen Blazer
Imagine you are listing a vintage beige linen blazer. Your original front-on hanger photo shows the lapels, buttons, and pockets, but it does not immediately show whether the blazer looks boxy, cropped, or fitted. You could use an AI fashion model image to provide a broad styling reference: a front-facing model wearing a neutral top with the blazer presented in a simple pose.
Before publishing, compare the generated image with the original blazer photos. Check that the lapel shape, button count, pocket placement, sleeve length, color, and hemline still look consistent with the actual item. If the AI image changes the jacket from warm beige to bright white, removes visible texture, lengthens the sleeves, or makes the shoulders look sharply tailored when they are relaxed, do not use it as-is.
Your final image order might look like this:
| Image position | Purpose |
|---|---|
| 1 | Original front photo showing the actual blazer |
| 2 | Original back photo |
| 3 | AI fashion model image for styling context |
| 4 | Close-up of linen texture, buttons, and label |
| 5 | Photo of a small mark or wear area, if present |
| 6 | Measurement reference photo |
This structure leads with reality, then adds inspiration. It gives shoppers both the practical information and the visual context they need.
AI Fashion Model vs. Ghost Mannequin vs. Flatlay
Different clothing presentation styles solve different problems. Choosing the right one depends on your garment, audience, and listing goals.
| Presentation style | Best for | Key consideration |
|---|---|---|
| AI fashion model | Showing general styling and silhouette | Review carefully for inaccurate fit, color, and garment details |
| Ghost mannequin | Showing garment structure without a visible person | Helpful for necklines, interiors, shape, and a clean catalog look |
| Flatlay | Casual pieces, knitwear, accessories, and detail-focused photos | May not show volume or body proportions clearly |
| Hanger photo | Fast, honest documentation of resale inventory | Can look less styled, but works well with detail shots |
| Folded presentation | Tees, sweaters, denim, and compact product views | Use additional images to show the full shape |
A ghost mannequin image is often the more neutral choice when you want to emphasize garment construction rather than lifestyle styling. An AI model can be more useful when the central question is, “What kind of outfit does this create?”
What to Check Before You Publish
AI editing can create a visually appealing image, but every output needs a manual review. Never assume the generated version accurately represents the item simply because it looks polished.
- Compare the garment color against the original photo in neutral light.
- Check logos, prints, stripes, embroidery, buttons, zippers, pockets, and hardware.
- Look closely at collars, cuffs, armholes, waistlines, and hems.
- Make sure the clothing has not been reshaped into a different size or cut.
- Confirm that any visible flaws in original photos are not concealed in the listing.
- Review hands, sleeves, edges, and layered areas for unnatural visual artifacts.
Helpful rule: If the AI fashion model image and the real garment photo tell different stories about the item, let the original garment photo guide your decision.
It is also wise to write a straightforward note in the listing when an image is digitally enhanced or model-generated. A short disclosure supports buyer confidence without distracting from the product details.
Write Descriptions That Match the Images
Strong e-commerce photography works best alongside accurate copy. Do not describe a garment as “tailored,” “oversized,” “slim fit,” or “true to size” based solely on how it appears in a generated model image. Use the garment’s tag size, flat measurements, fabric composition, and real construction instead.
For example, a transparent description for the vintage linen blazer could say:
“Vintage linen-blend blazer in warm beige. Tagged size medium; please compare the listed measurements for best fit. Features a relaxed shoulder, two front buttons, and front pockets. One small mark is shown in the final photo. Model-style image is included for styling reference; review all original item photos for color and condition.”
This wording is practical because it directs shoppers to the evidence that matters. It does not overstate fit, conceal condition, or imply that every buyer will experience the same silhouette.
Common Mistakes to Avoid
- Using only generated images: Buyers need original photos of the exact item.
- Changing the garment’s color: Even small shifts can cause disappointment and returns.
- Showing an unrealistic fit: A model image cannot replace measurements or fit notes.
- Removing visible wear: Editing should not hide defects that affect purchase decisions.
- Adding accessories that are not included: If styling props appear, make it clear that they are not part of the sale.
- Skipping platform rules: Review the image and disclosure requirements of the marketplace where you sell.
Build a Buyer-First Visual Strategy
The most effective AI fashion model workflow is not about making every listing look like a campaign. It is about helping a buyer understand a real garment quickly and confidently. Keep original product photography at the center, add enhanced presentation only when it clarifies the item, and make measurements and condition information easy to find.
For sellers who also want a clean, body-free apparel presentation, Clothing Studio offers tools for garment editing, including a practical guide to creating ghost mannequin photos. Whichever presentation style you choose, review the final images against the original garment before listing.
